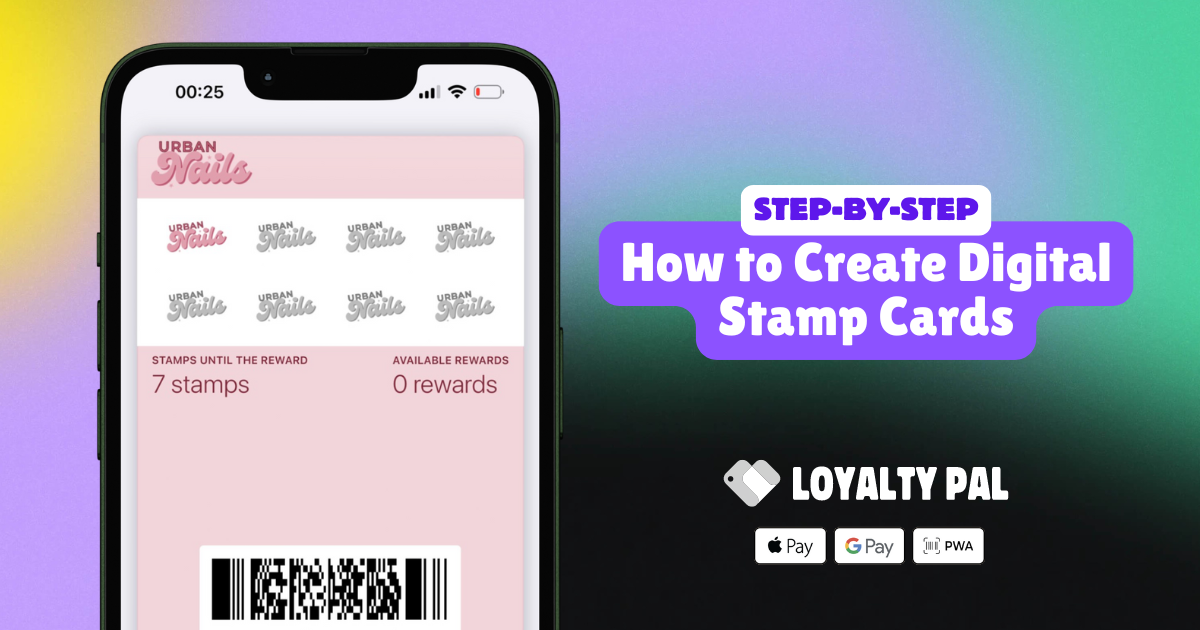
Lean how to creating a digital stamp card on the LoyaltyPal platform. This guide will be in-depth explaining each options when creating a digital stamp card.
Creating a Stamp Card
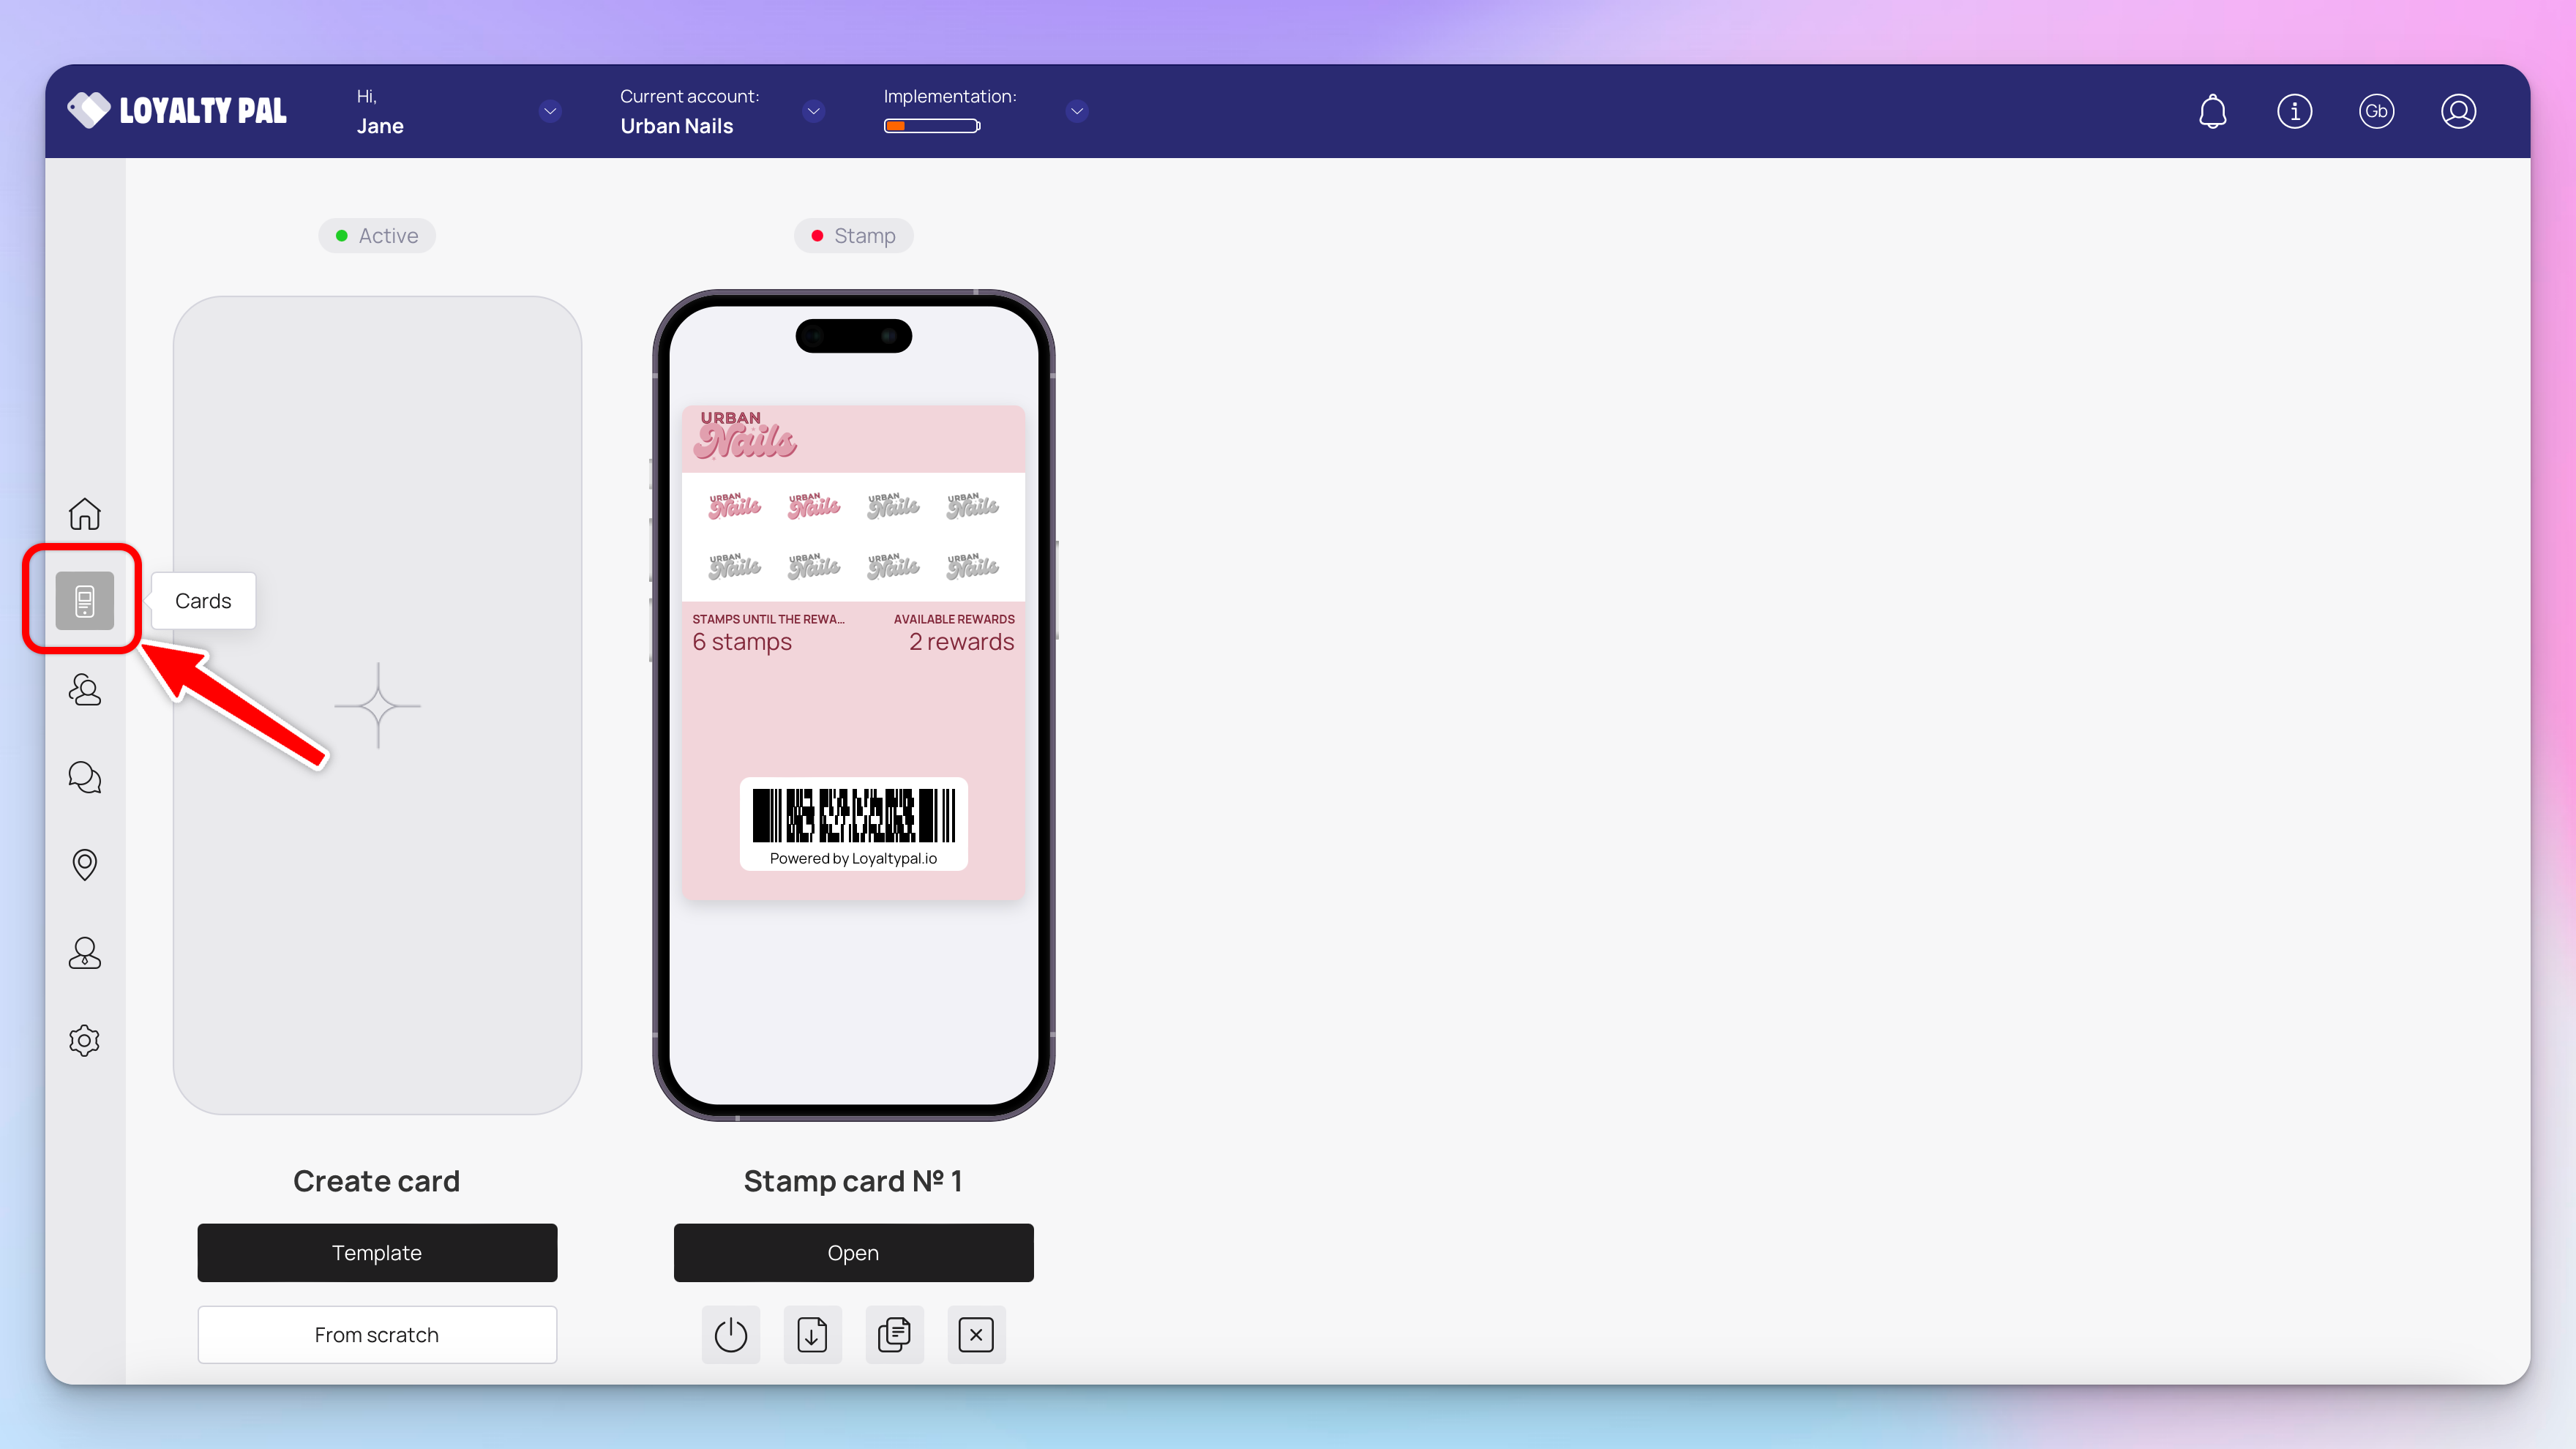
- Upon successful login, navigate to the left-hand menu.
- From the list of icons, click the card icon. Doing so opens the Cards module.
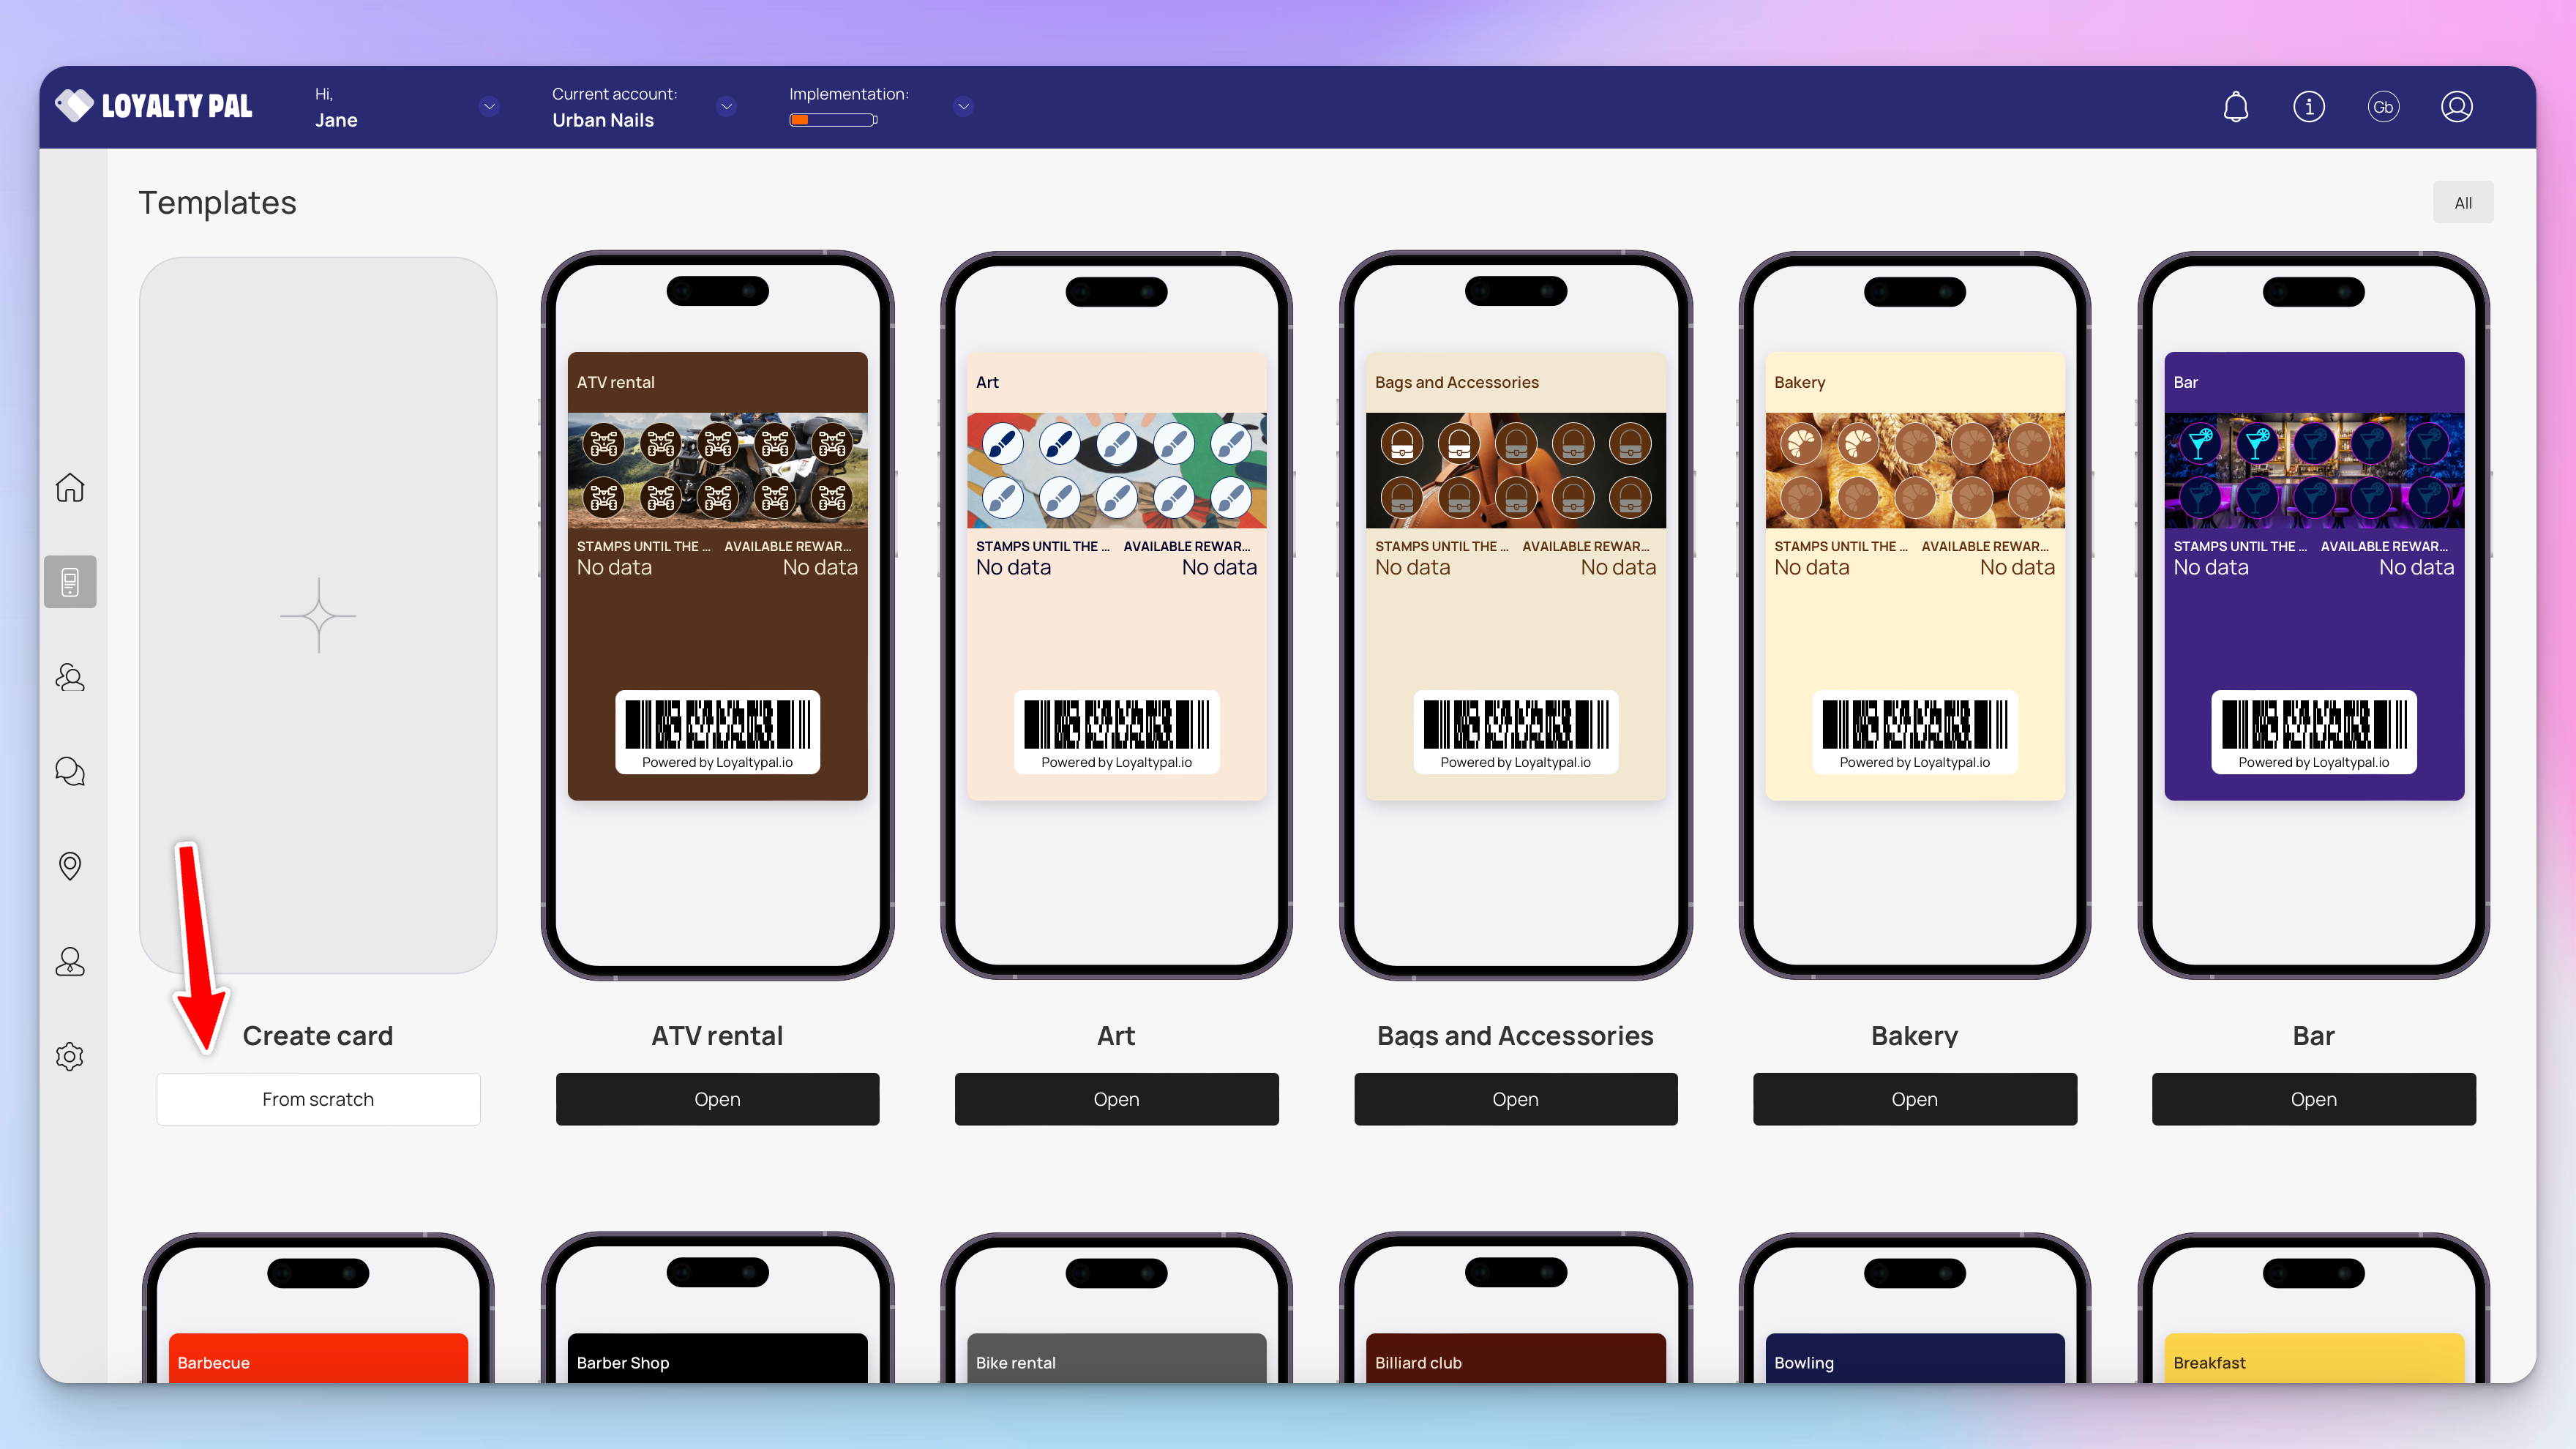
3. Here, you can either create a card using a template from a list of a wide range of pre-loaded templates or create one from scratch. To get a better understanding, we will take a look at card creation from scratch. Click the 'from scratch' button.
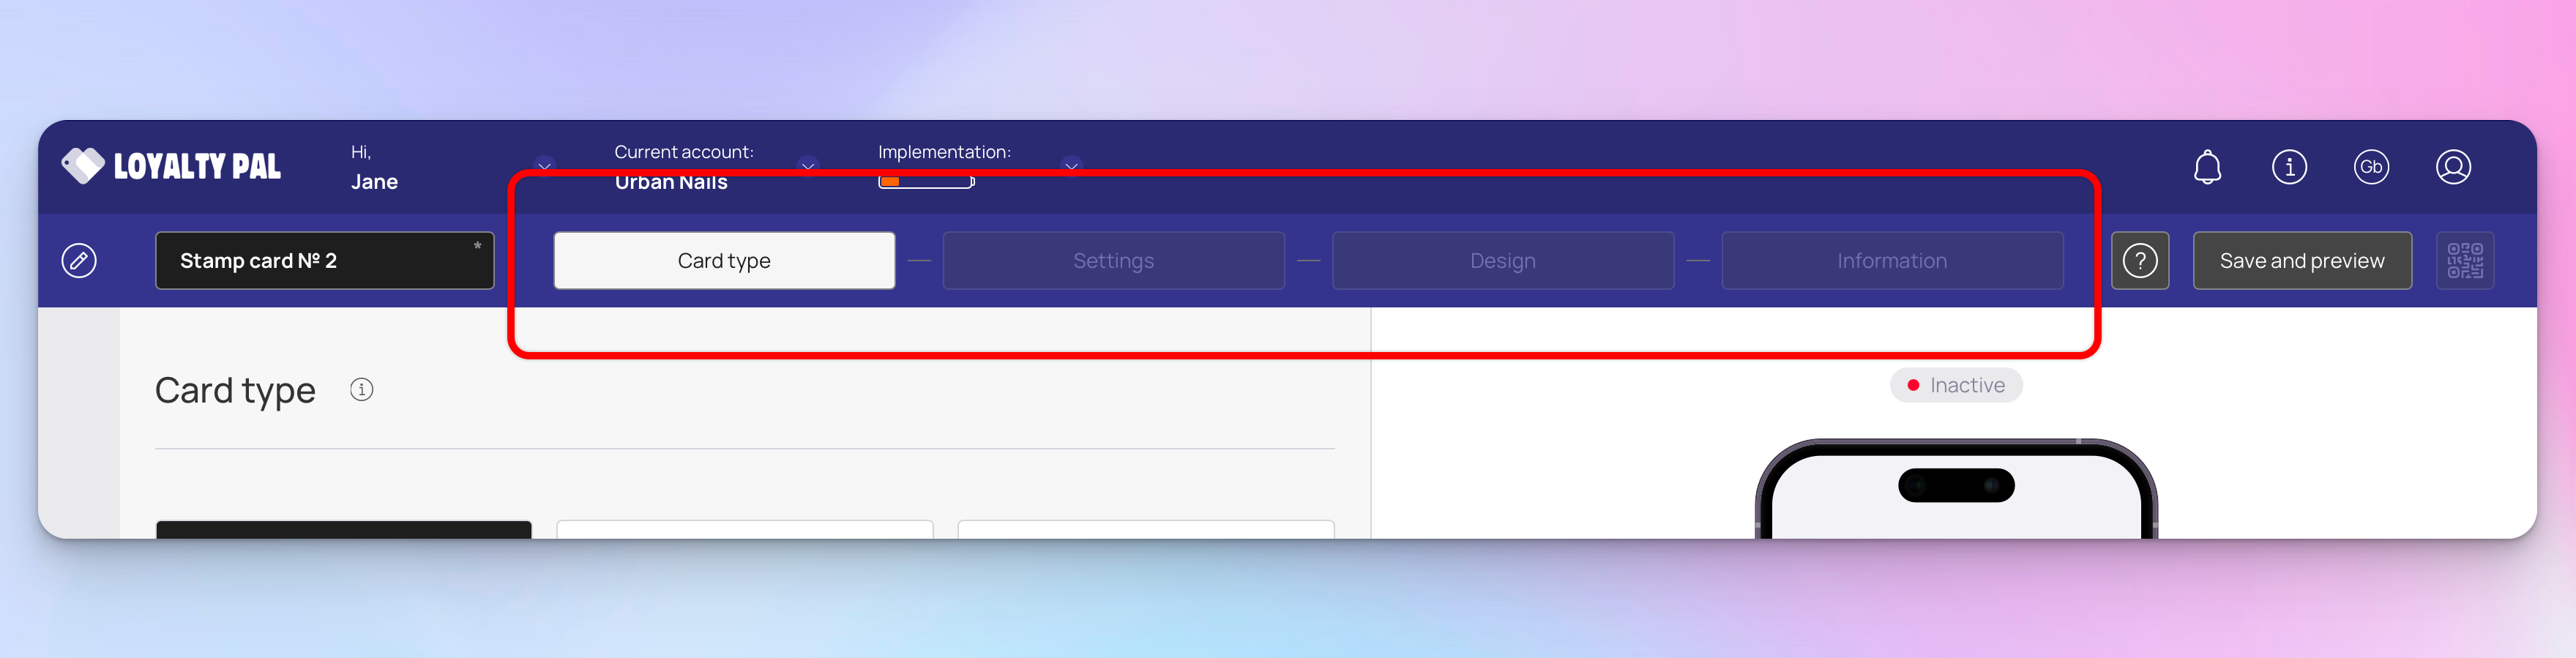
4. This initiates the card creation workflow. A card is created by filling in the details in 4 sections that include Card Type, Settings, Design, Information. Let us take a look at how each section works.
Card Type
This is the first section. Here, you make a selection regarding the type of card you want to create.
1. From the available card types, click Stamp.
2. Once selected, click the Continue button. As a result, you land on the Settings section.

Settings
In this section you will configure the main settings for the card & create the fields for the customers registration page.

Barcode Type:
Card Expiration Date:
Stamp Life:
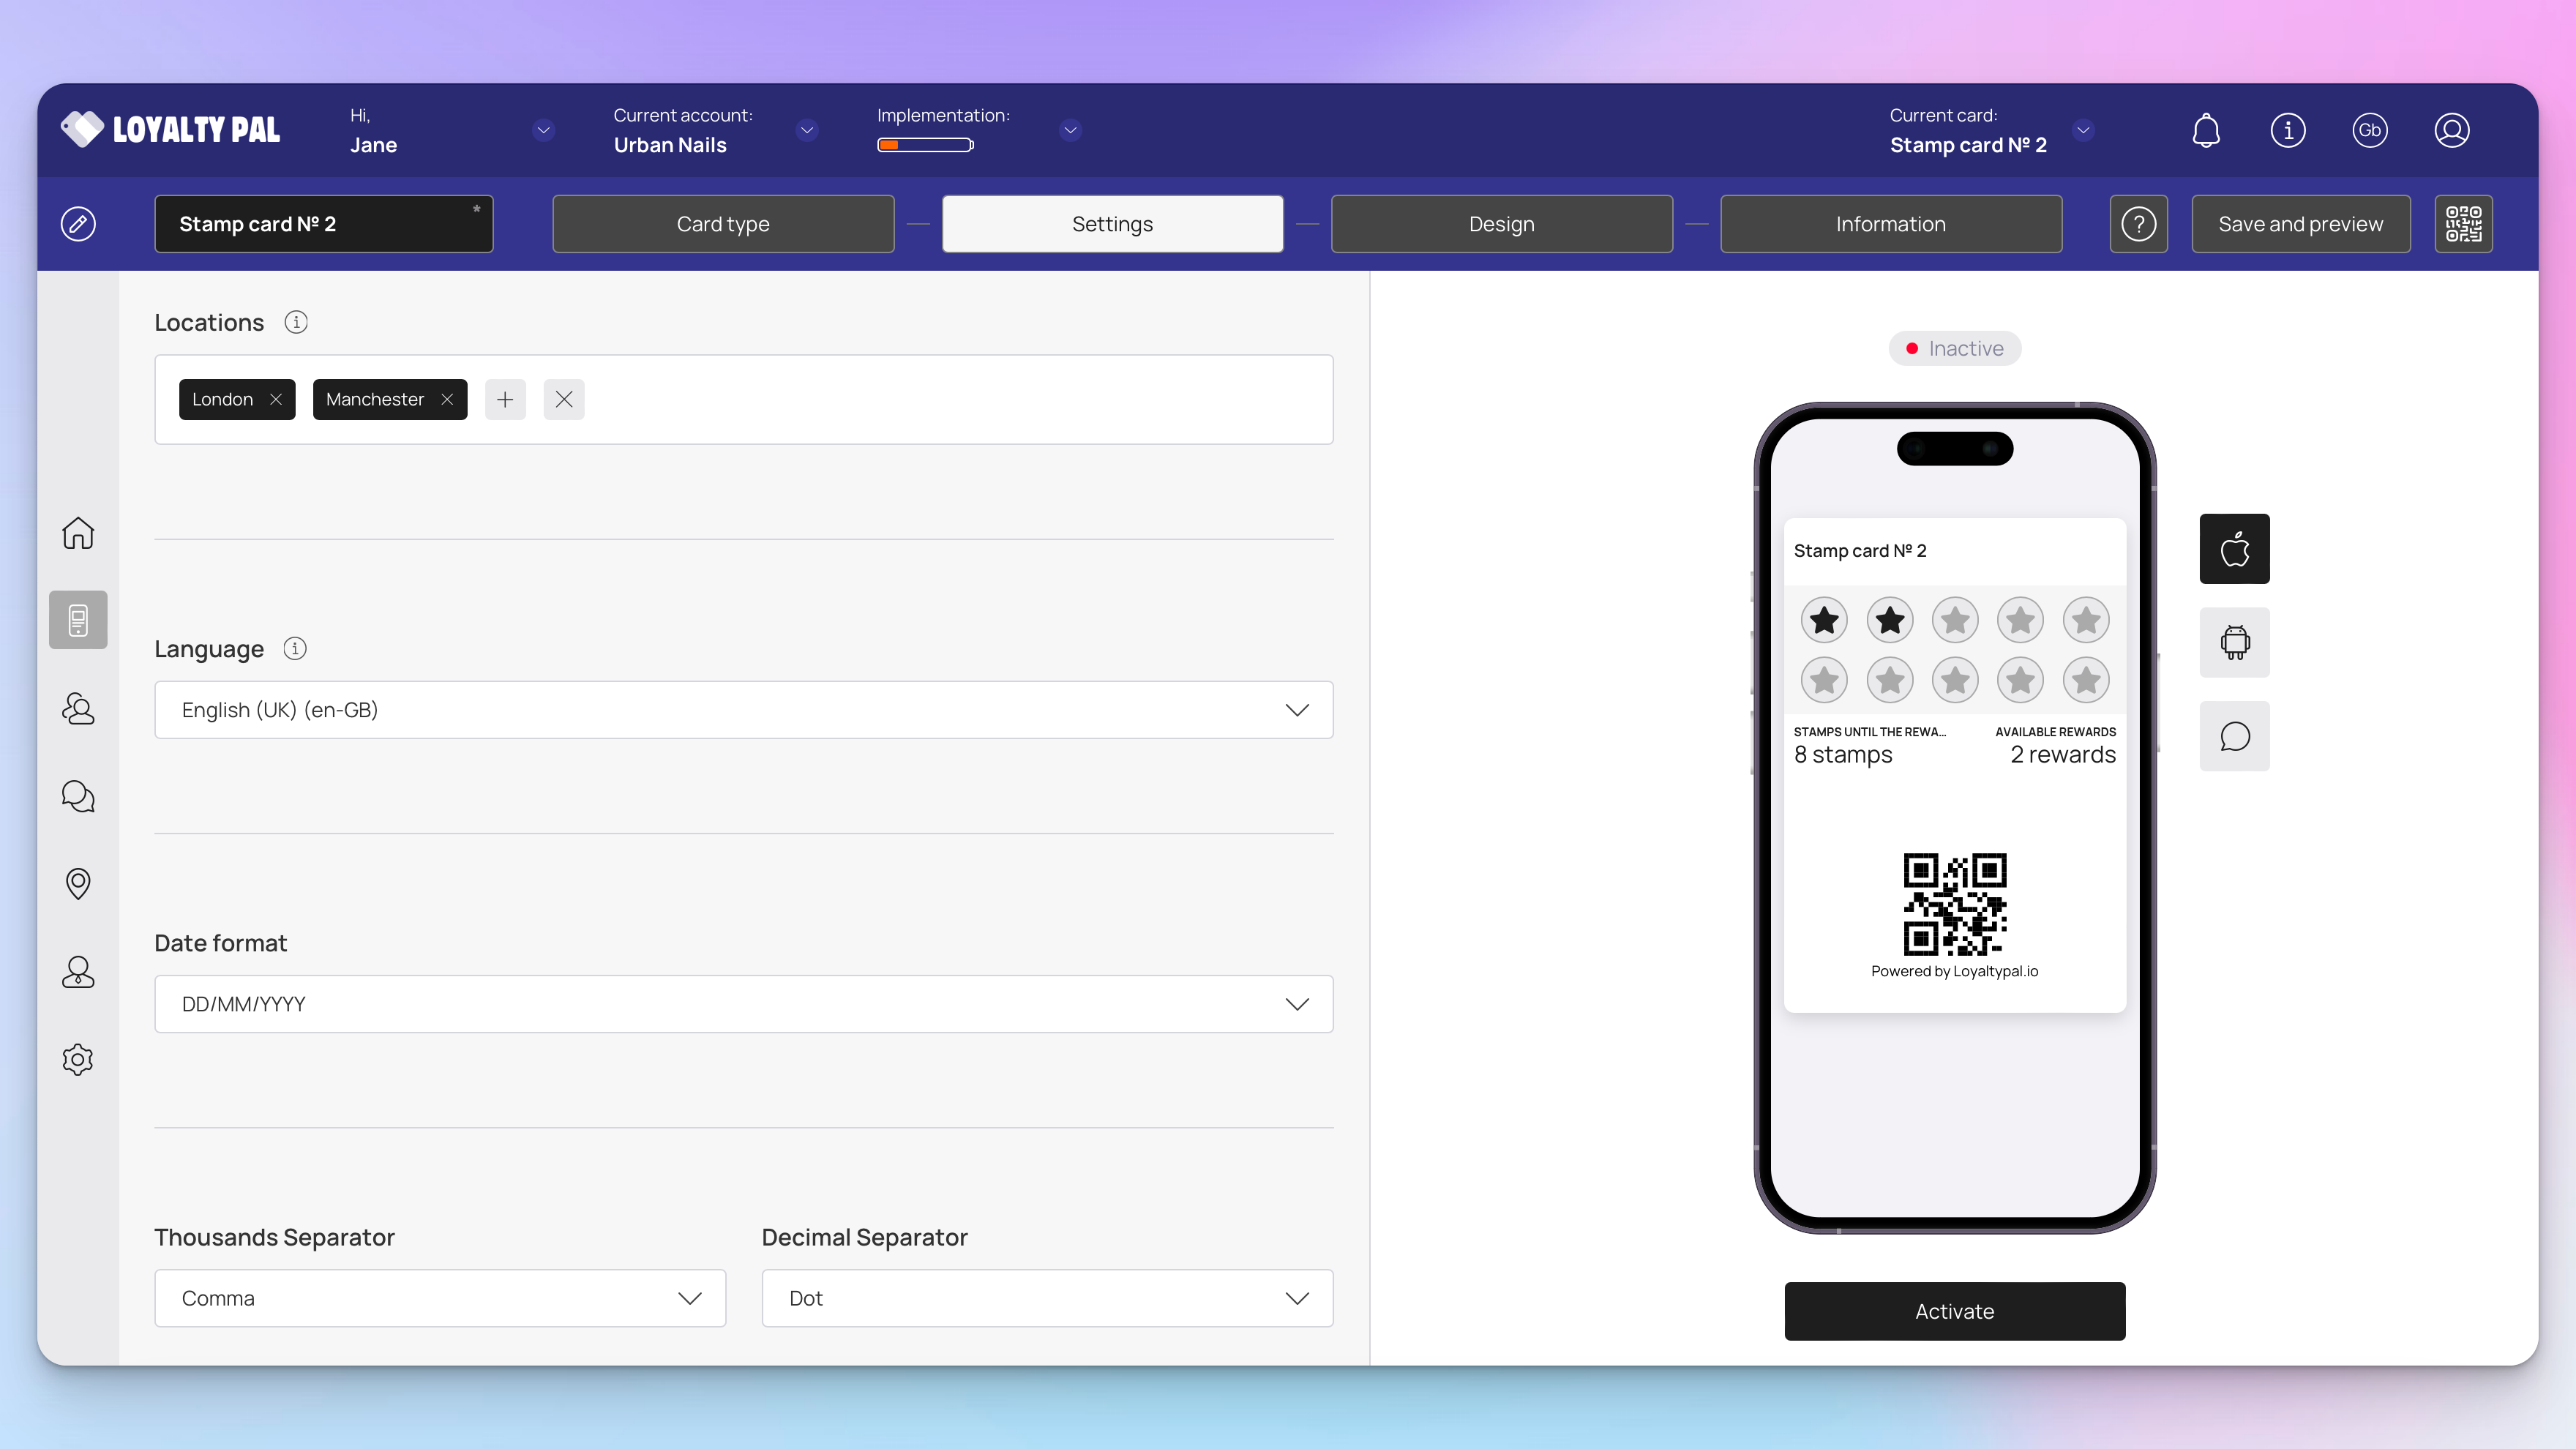
Locations: Set the location(s) of your business where the card can be used from the Locations field. Multiple selections can be made from here.
Language: The language in which the card information will be displayed.
Date Format: You can select the correct date format for your country.
Thousands Separator / Decimal Separator: Choose the correct format you'd like example 1,000.10
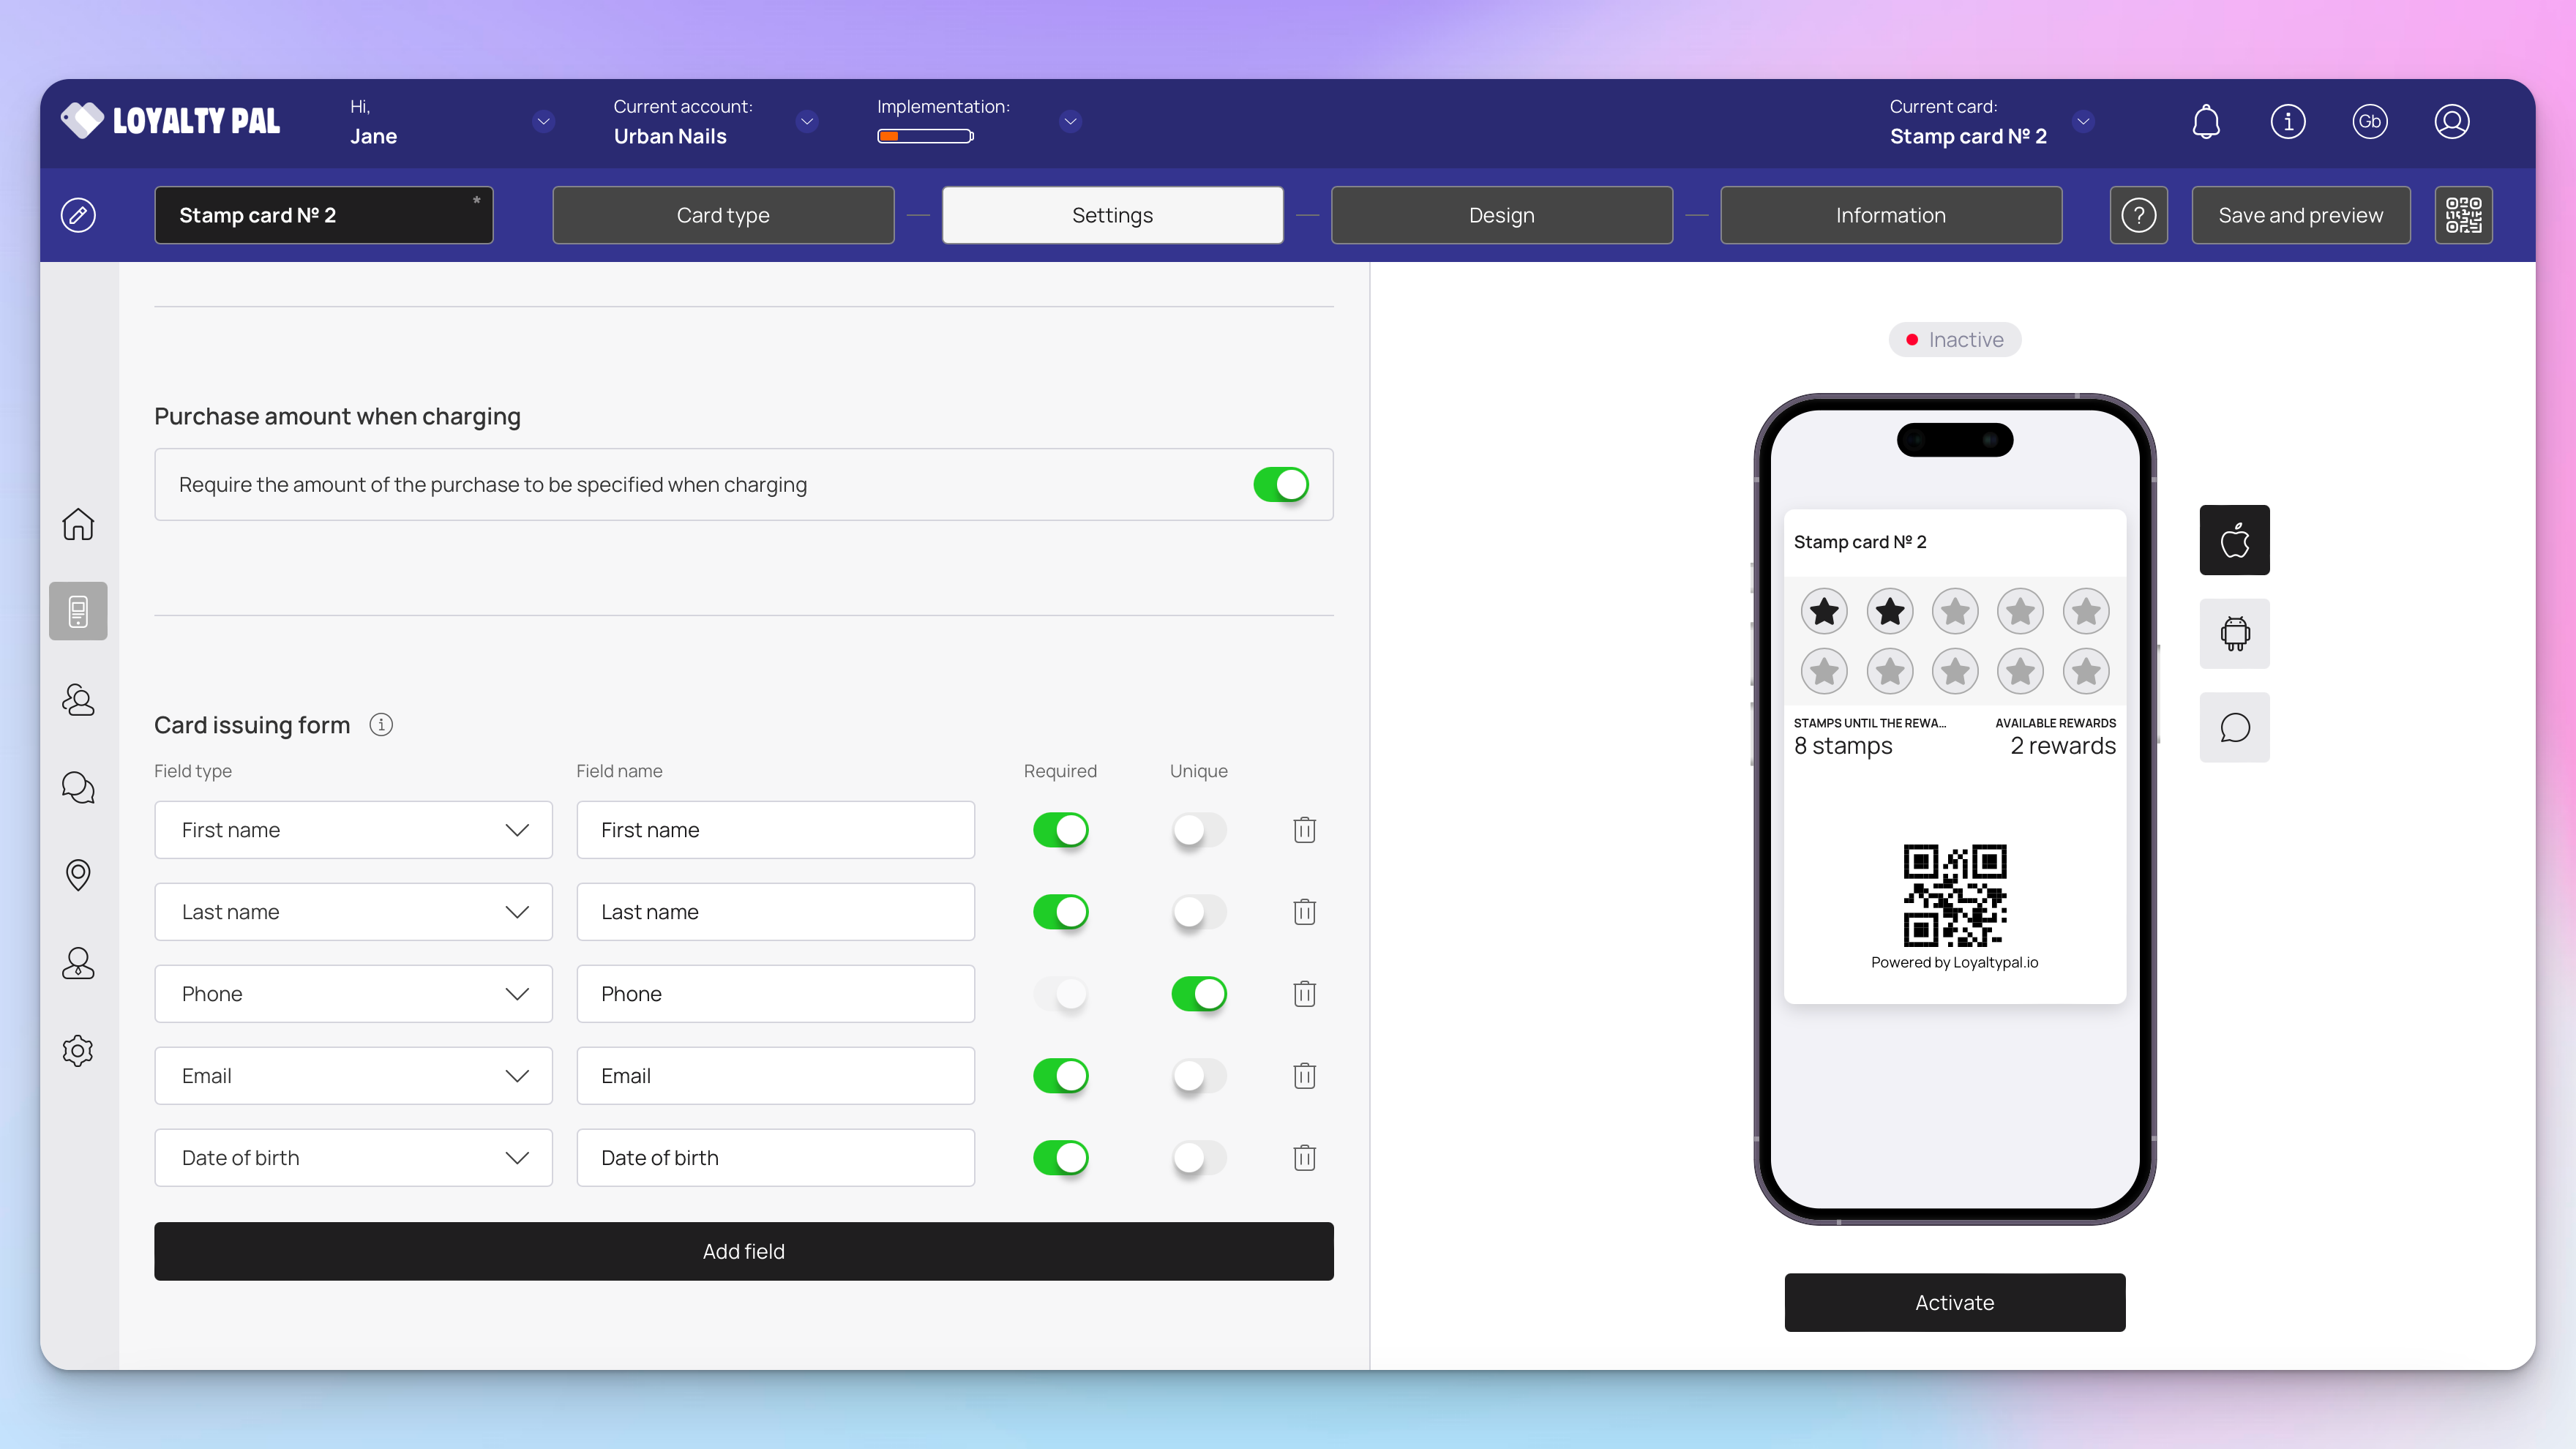
Purchase amount when charging: Require the employee to enter the customer spend amount when adding/redeeming stamps. This is useful for tracking analytics and customers spend.
Card issuing form: Here, you can define the fields you want to include on the stamp card registration page for customers. You can keep the default or add fields to collect custom data from customers. We recommend keeping this to a minimum to keep customer sign up quick. In case you want to make a field mandatory, enable the Required toggle. Similarly, if you want to record unique data in a field, enable the Unique toggle.
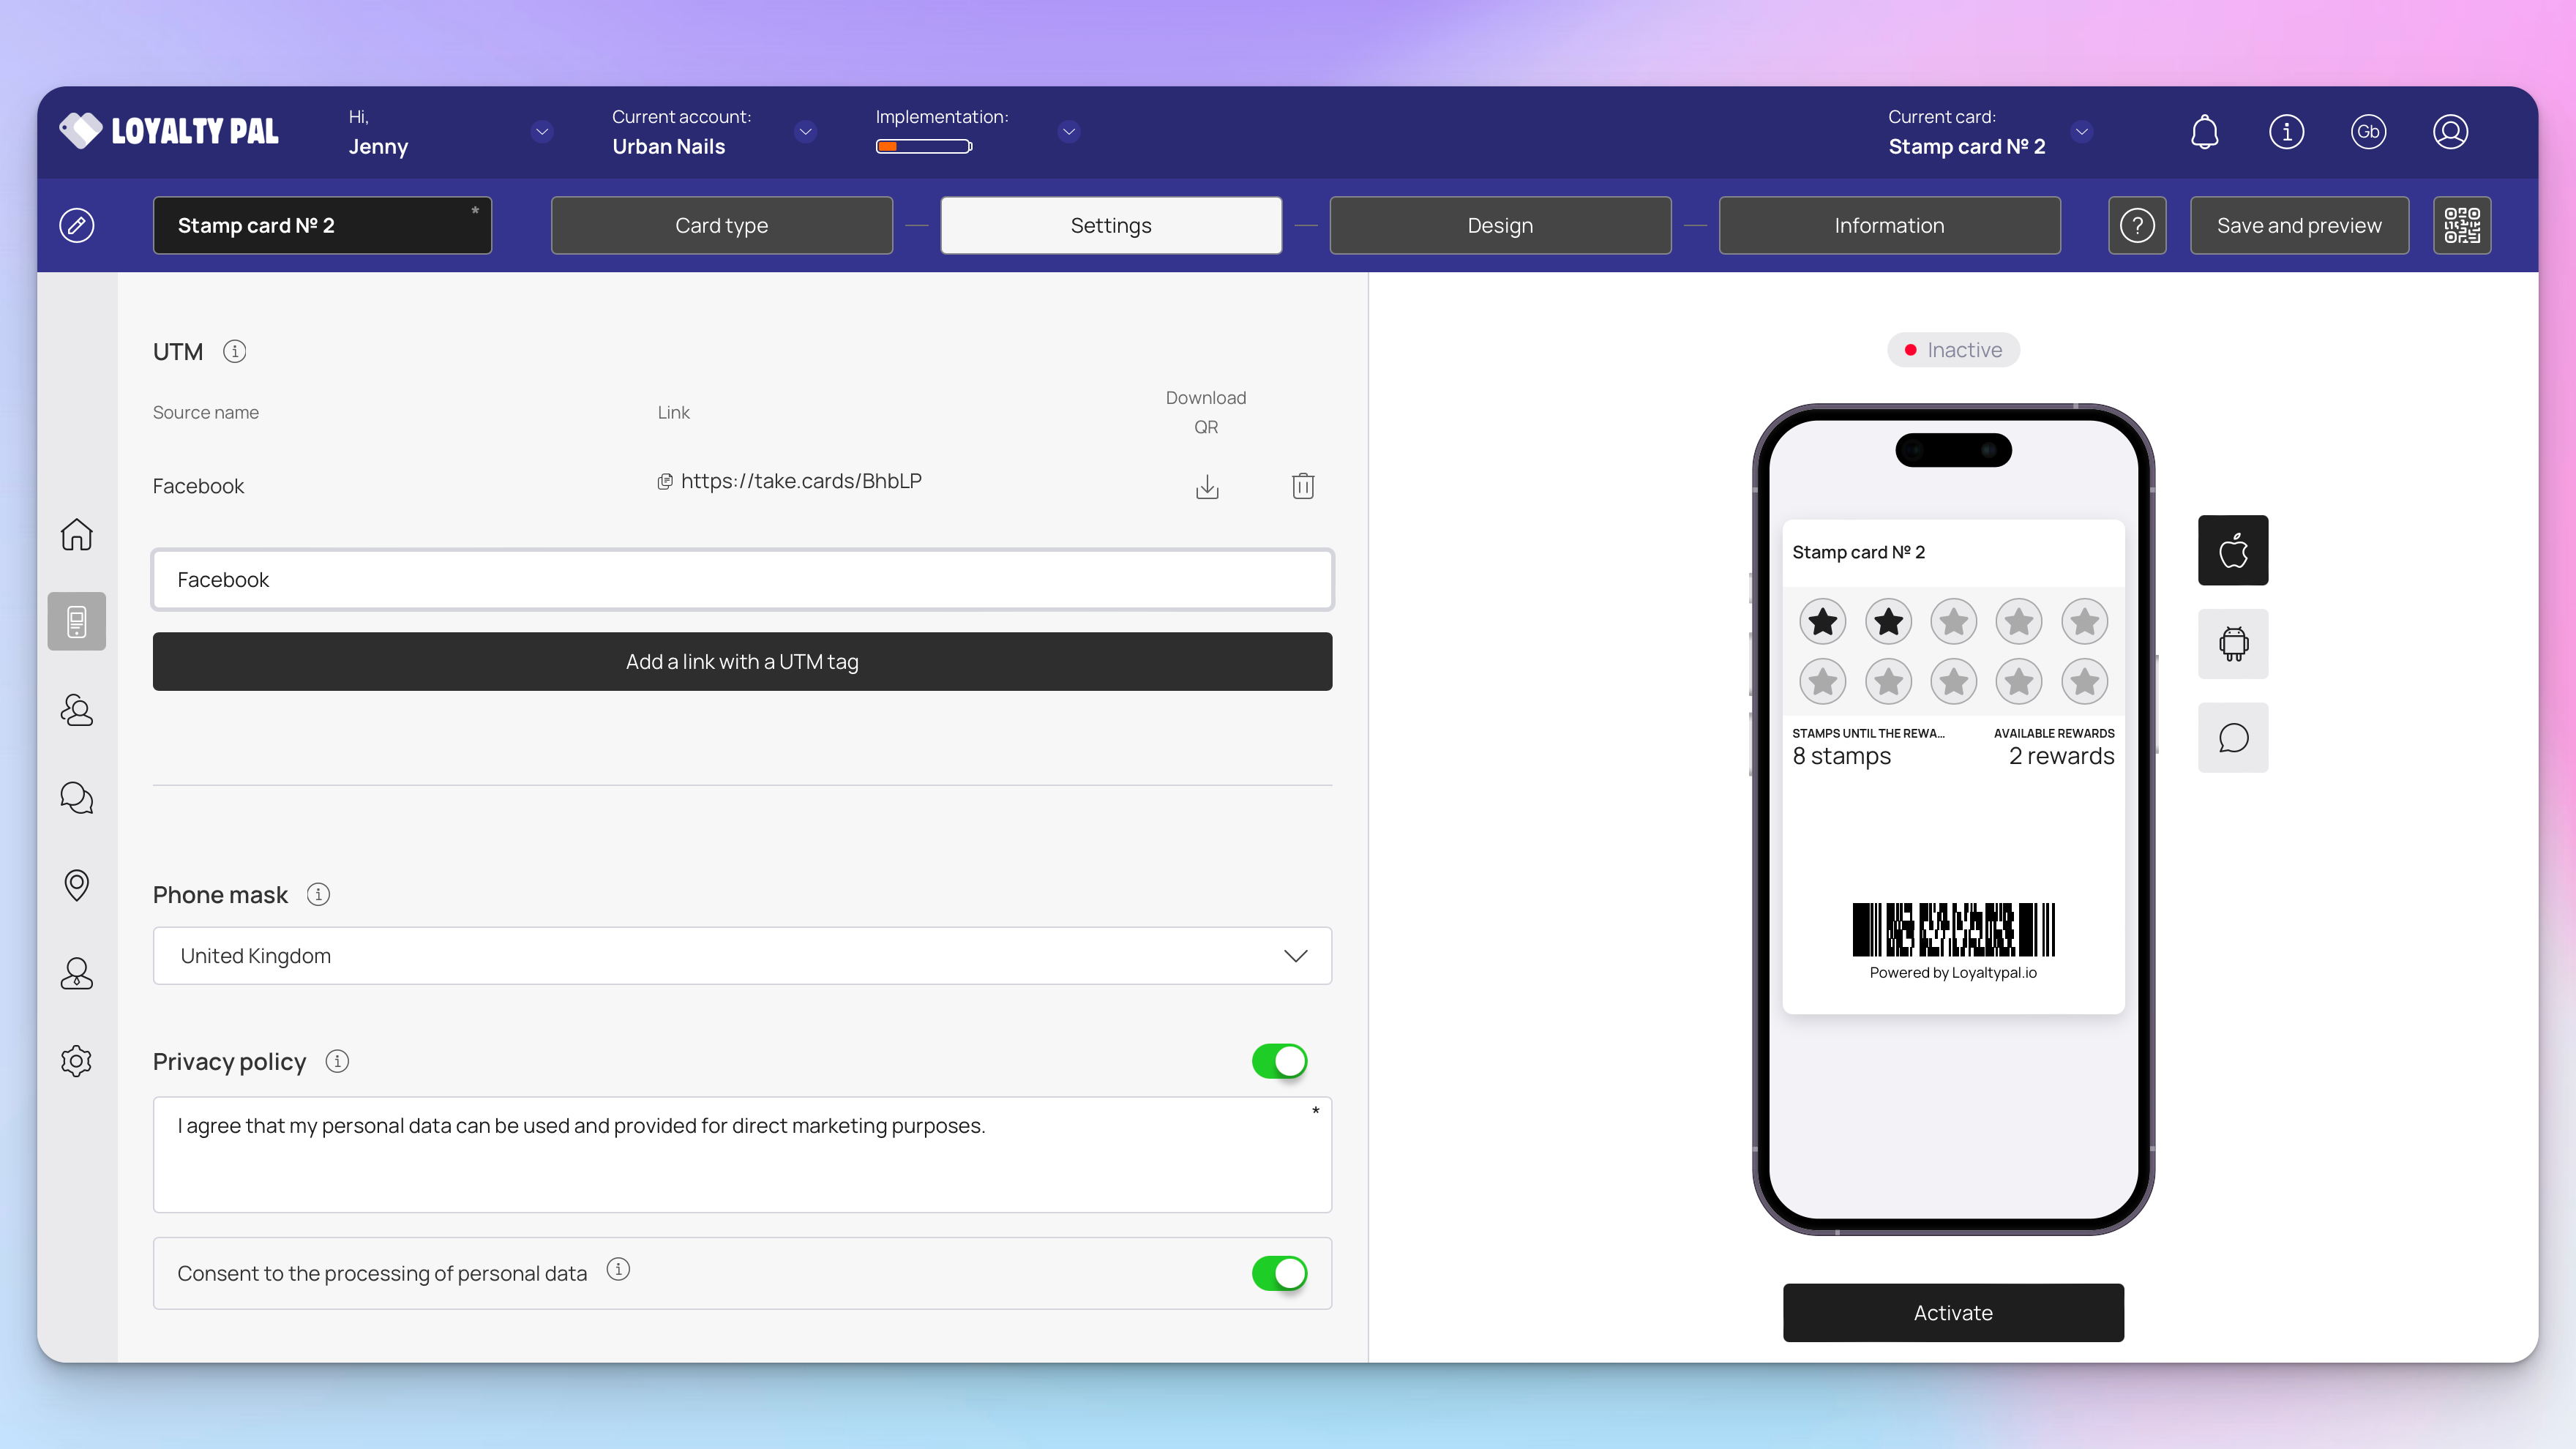
UTM: Here, you can create a channel link for the analytics to be tracked of the traffic generated by that channel. For instance, if you add Facebook in this field, LoyaltyPal will generate a URL automatically associated to a UTM tag. Great for tracking where your customers download your loyalty card from.
Phone mask: Select your local phone mask (where the majority of your customers are from) this will be default on the registration page for customers signing up.
Privacy Policy: You can specify the text of the privacy policy, as well as enable/disable the display of text. This is shown on the registration page for customers signing up. In case you want to include consent while processing personal information of the user, enable the toggle button next to Consent to the processing of personal data heading.
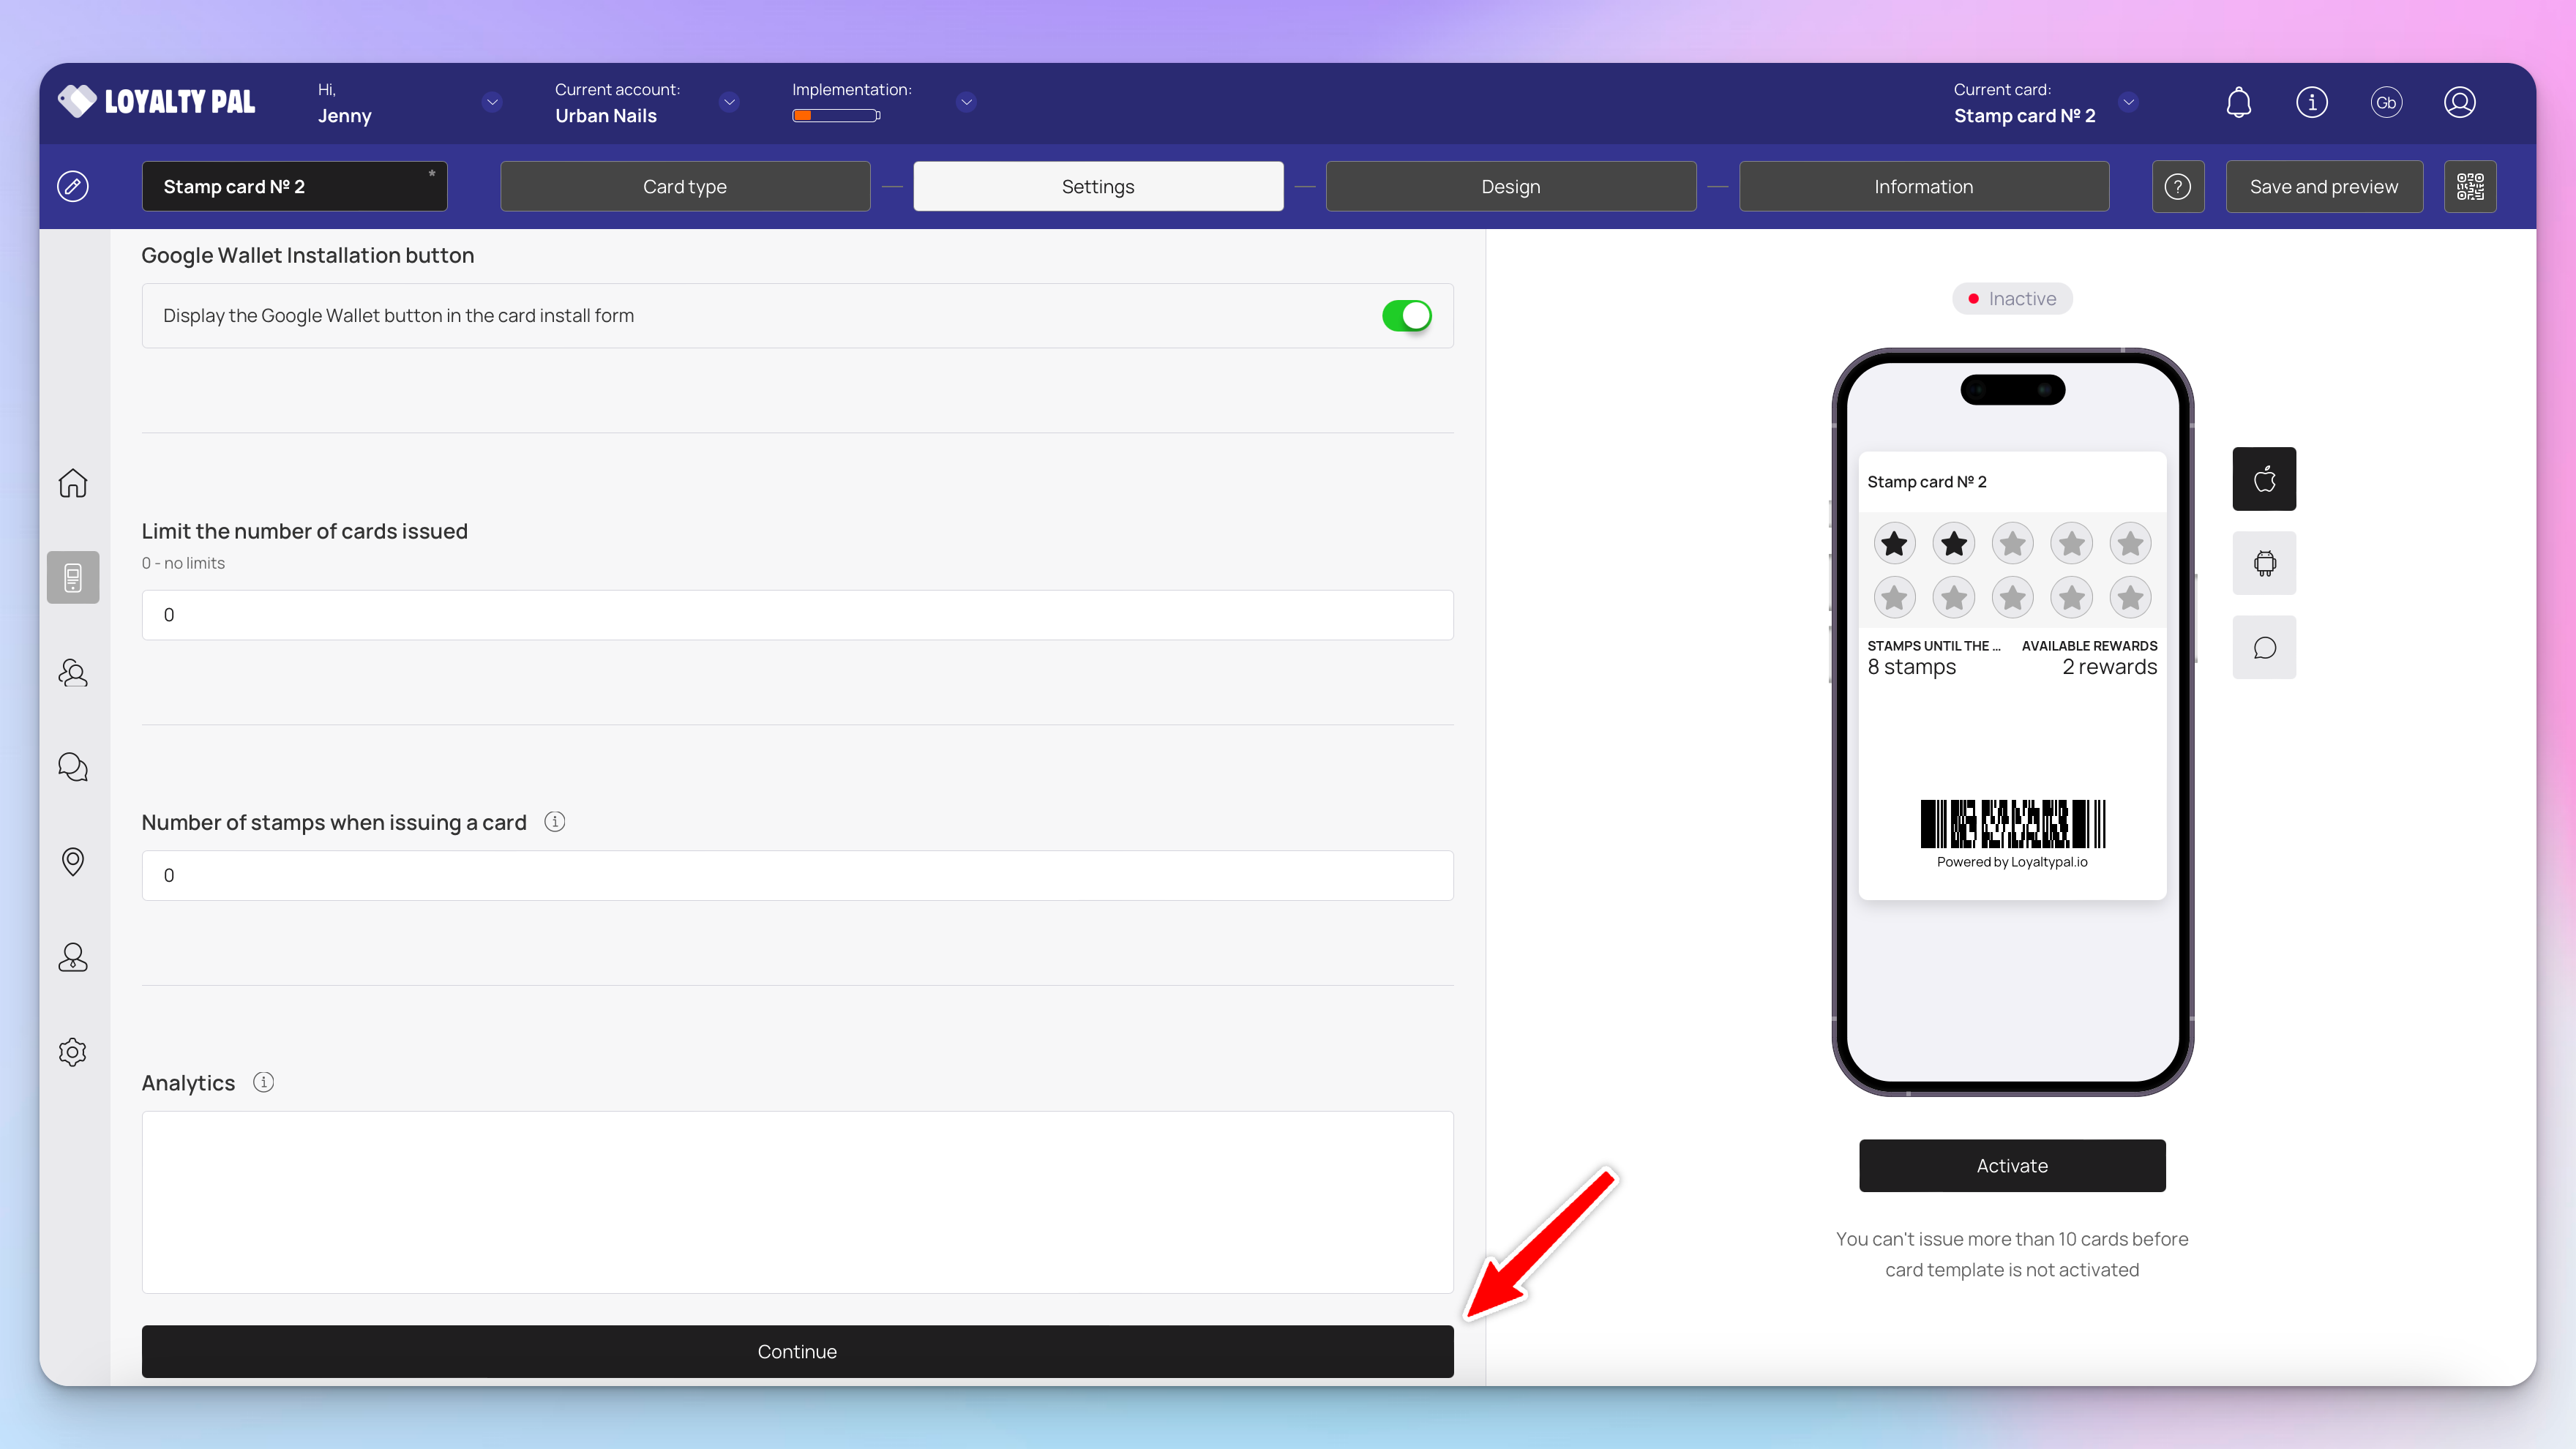
Google Wallet installation button: (Recommended to keep enabled) Option to disable customers adding the card to Google Wallet
Limit the number of cards issued: Set the number of cards you'd like to be issued '0' = unlimited. As an example this would be useful if you wanted to create a special card limited to the first 100 customers.
Analytics: This is where you can place analytics scripts, such as Google Tag Manager. These will be added to the card installation pages.
Settings section now completed click 'Continue' to go into the next section.
Design
This section lets you configure the design of the stamp card. Let's get creative!
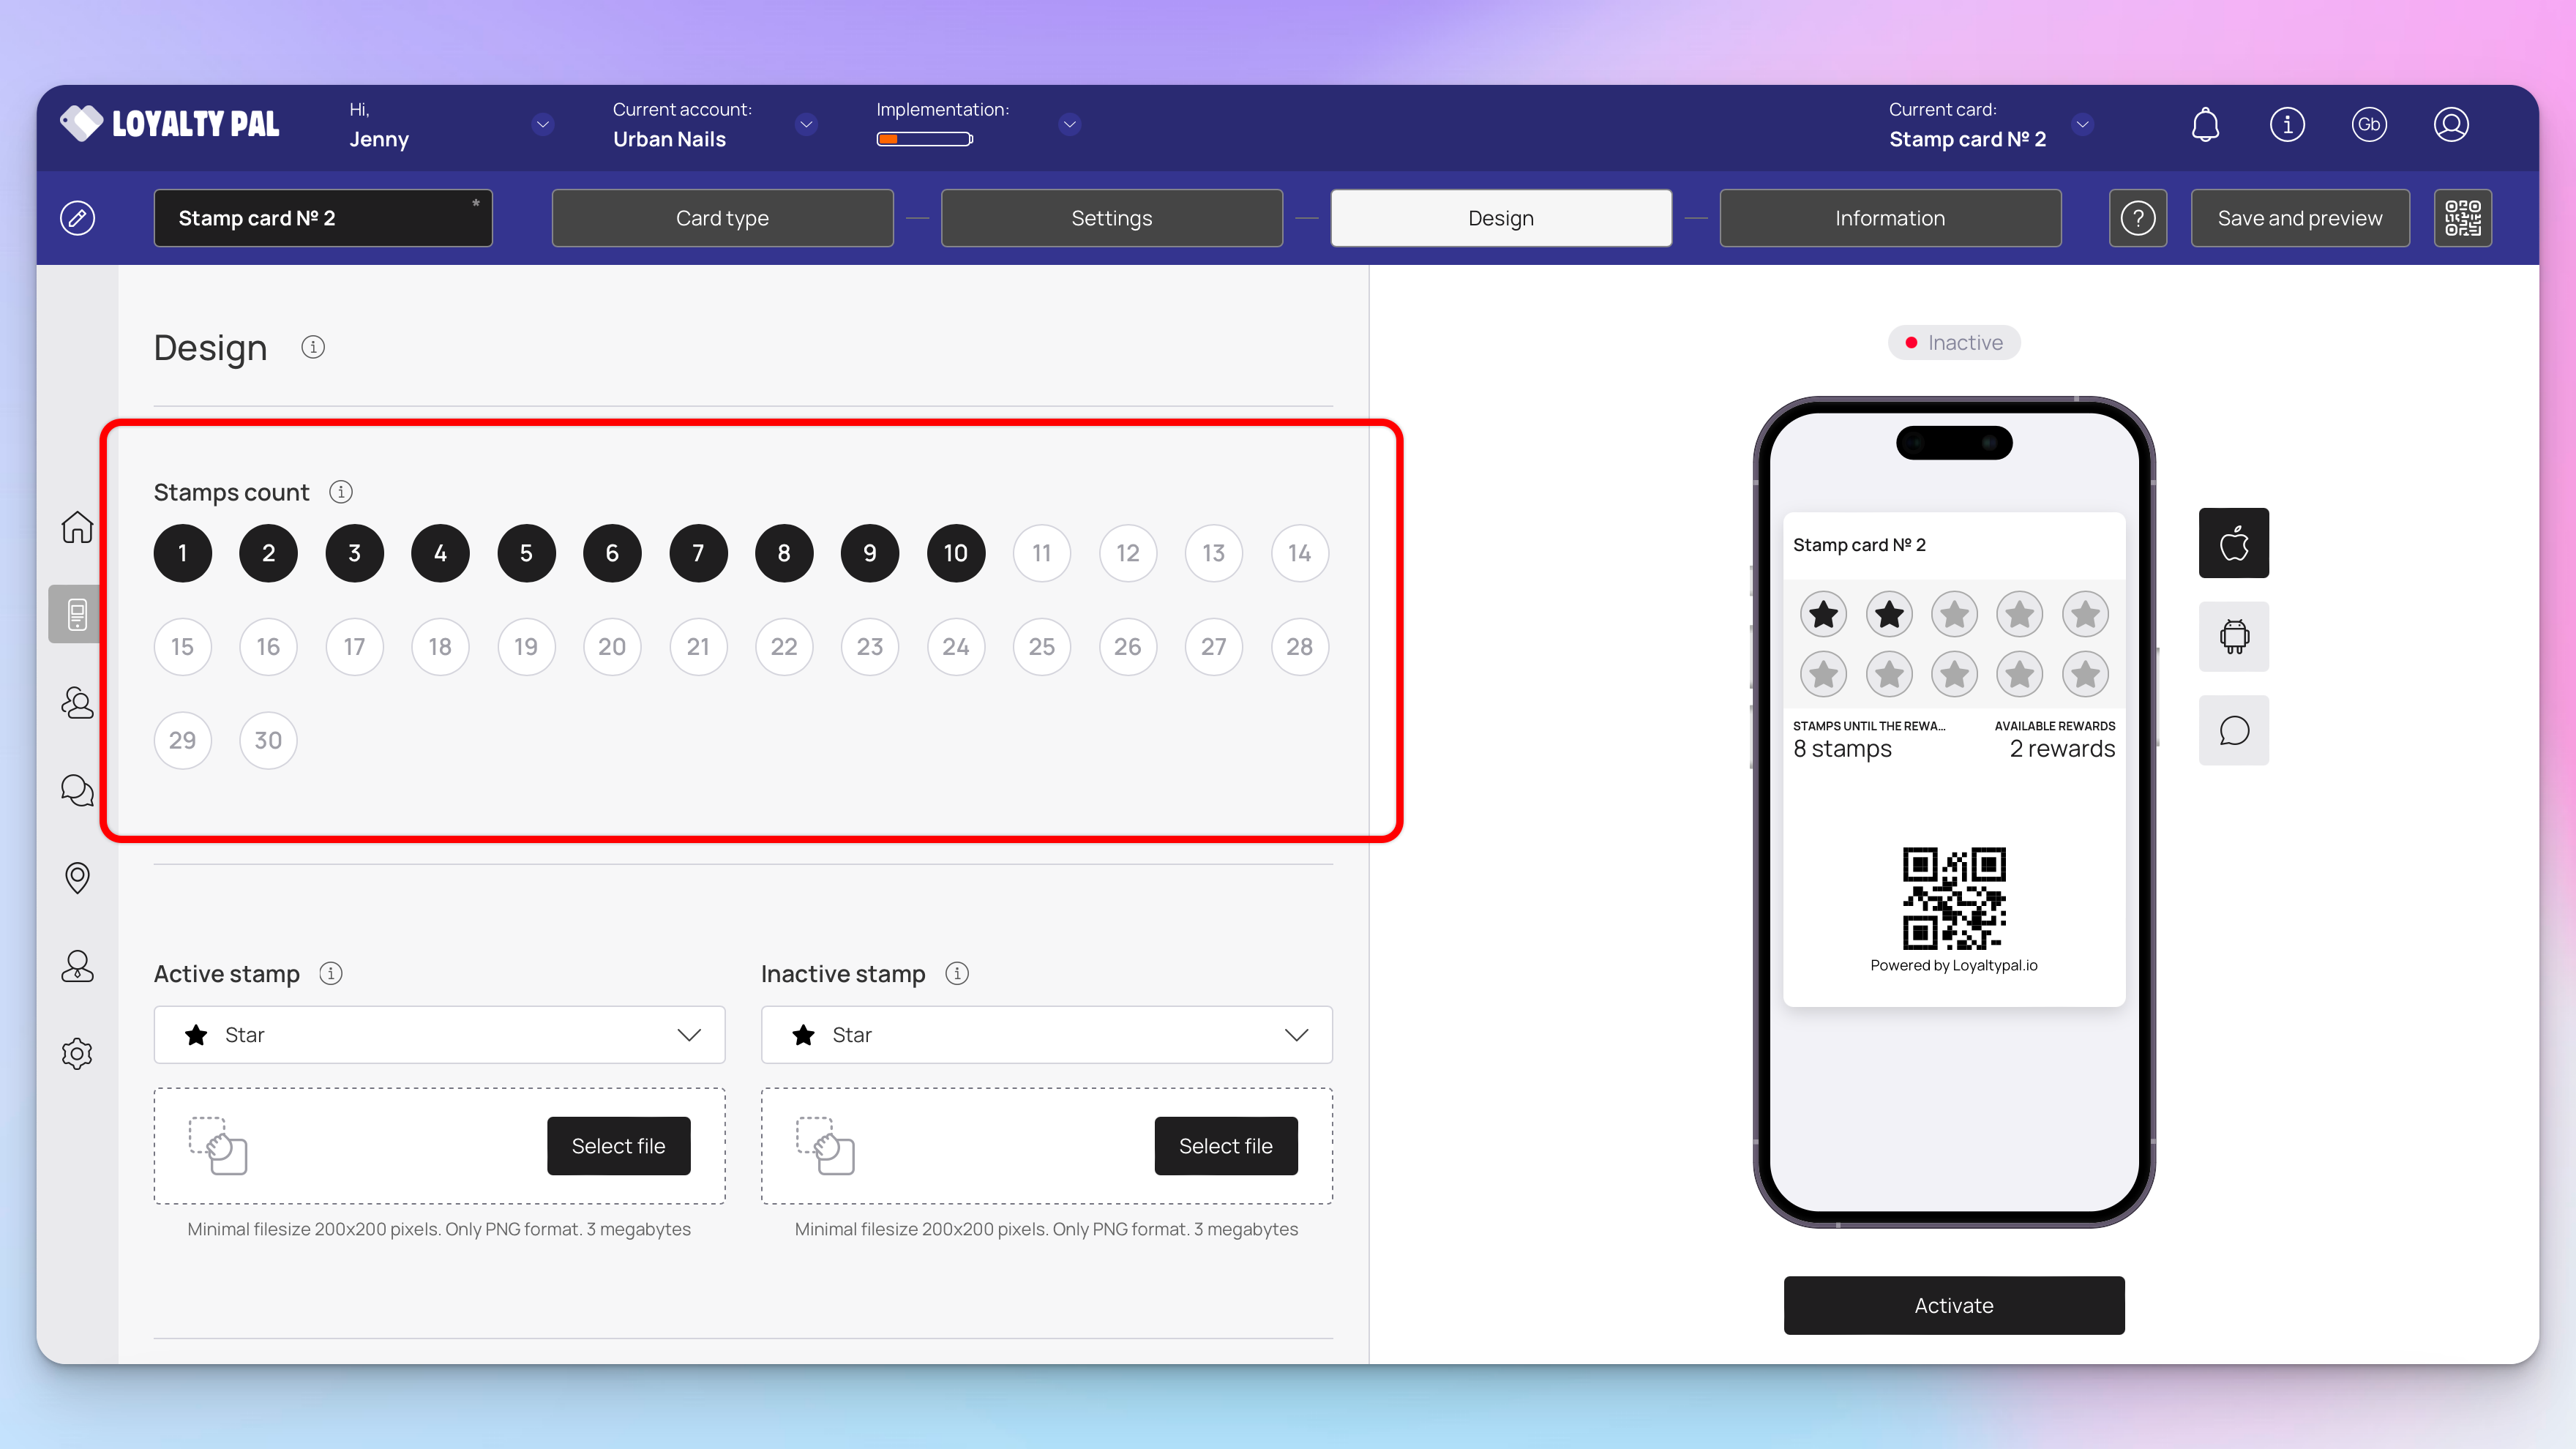
Stamp count: Choose the number of stamps between 1 - 30 at which the reward can be redeemed.
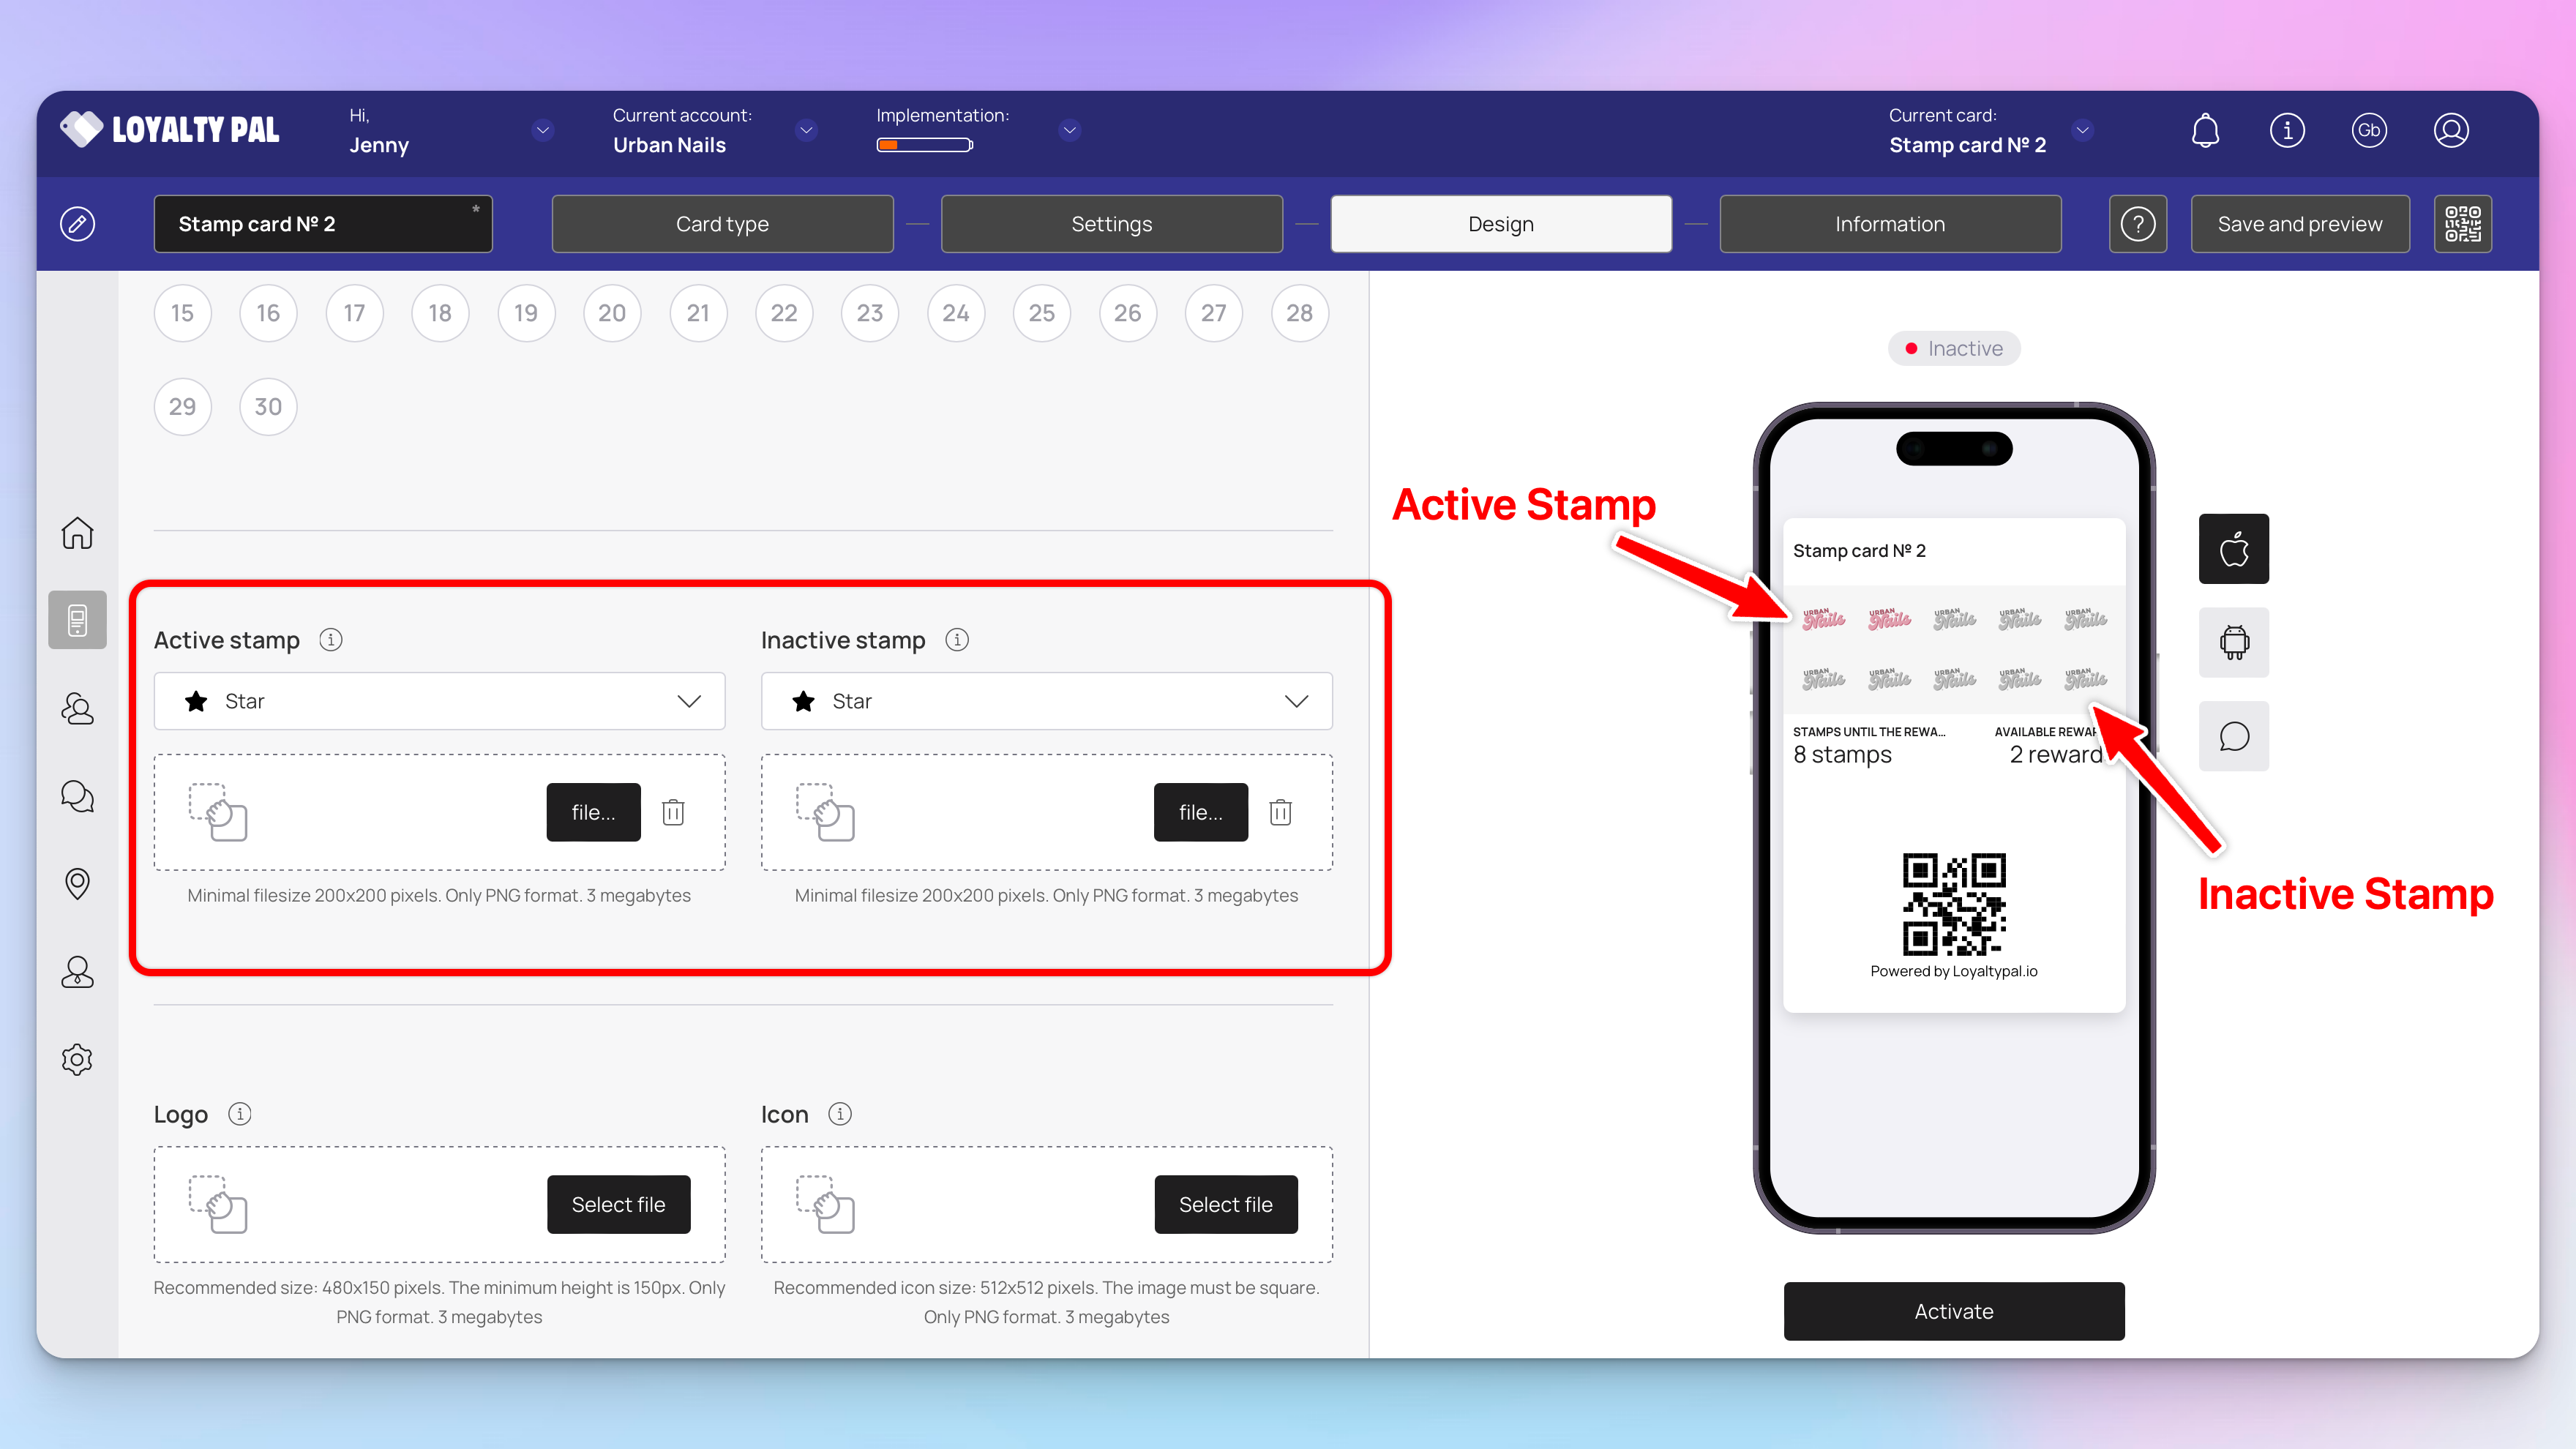
You can customise the stamps to fit your brand either choose from the list of pre-installed icons or upload your own.
Active stamp: This will show when a customer has earned the stamp. (The example shows the companies logo in colour)
Inactive stamp: Will show when the customer has yet to earn this stamp. (The example shows the companies logo in greyscale)
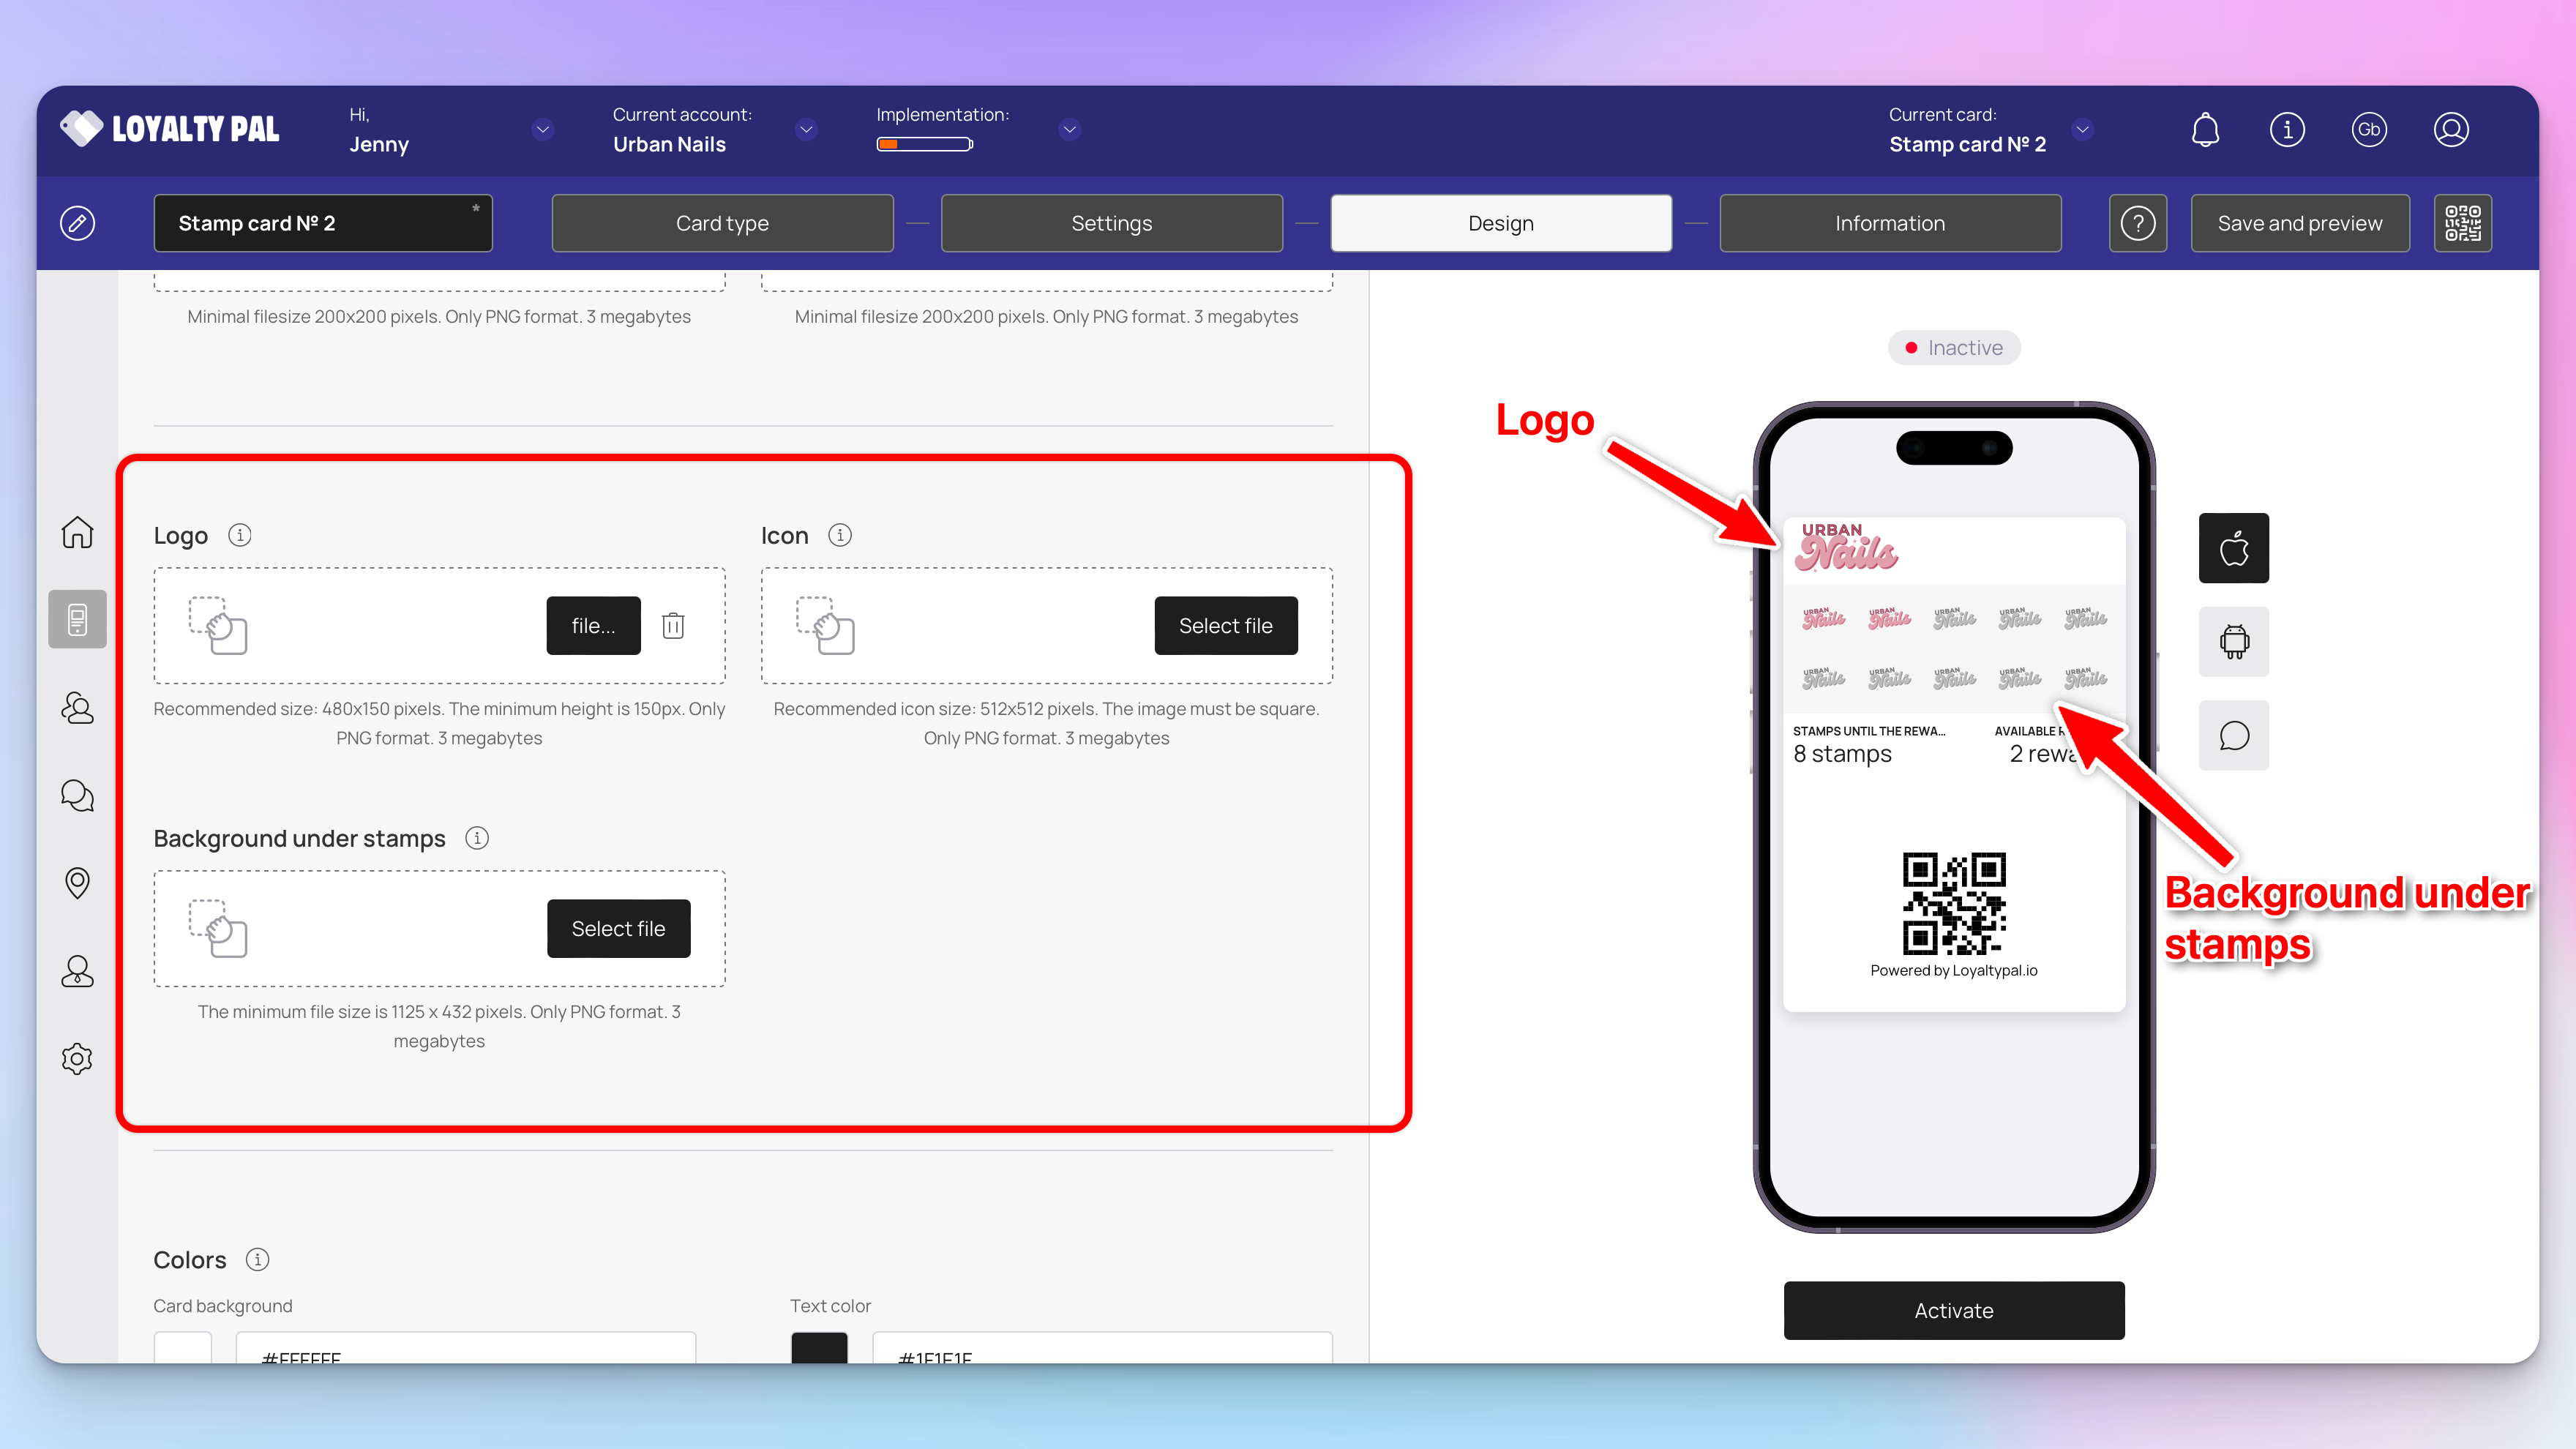
Logo: Click the 'Select File' button from the Logo heading to upload a logo to be displayed on the card.
Icon: The icon is used in the push notifications and if the customer adds the loyalty card via the PWA option it will be displayed as an app icon on the customers homepage.
Background under Stamps: Here you can upload an image that will be displayed under the stamps. (For this guide we will just be selecting a colour in the options below which will be displayed under the stamps)
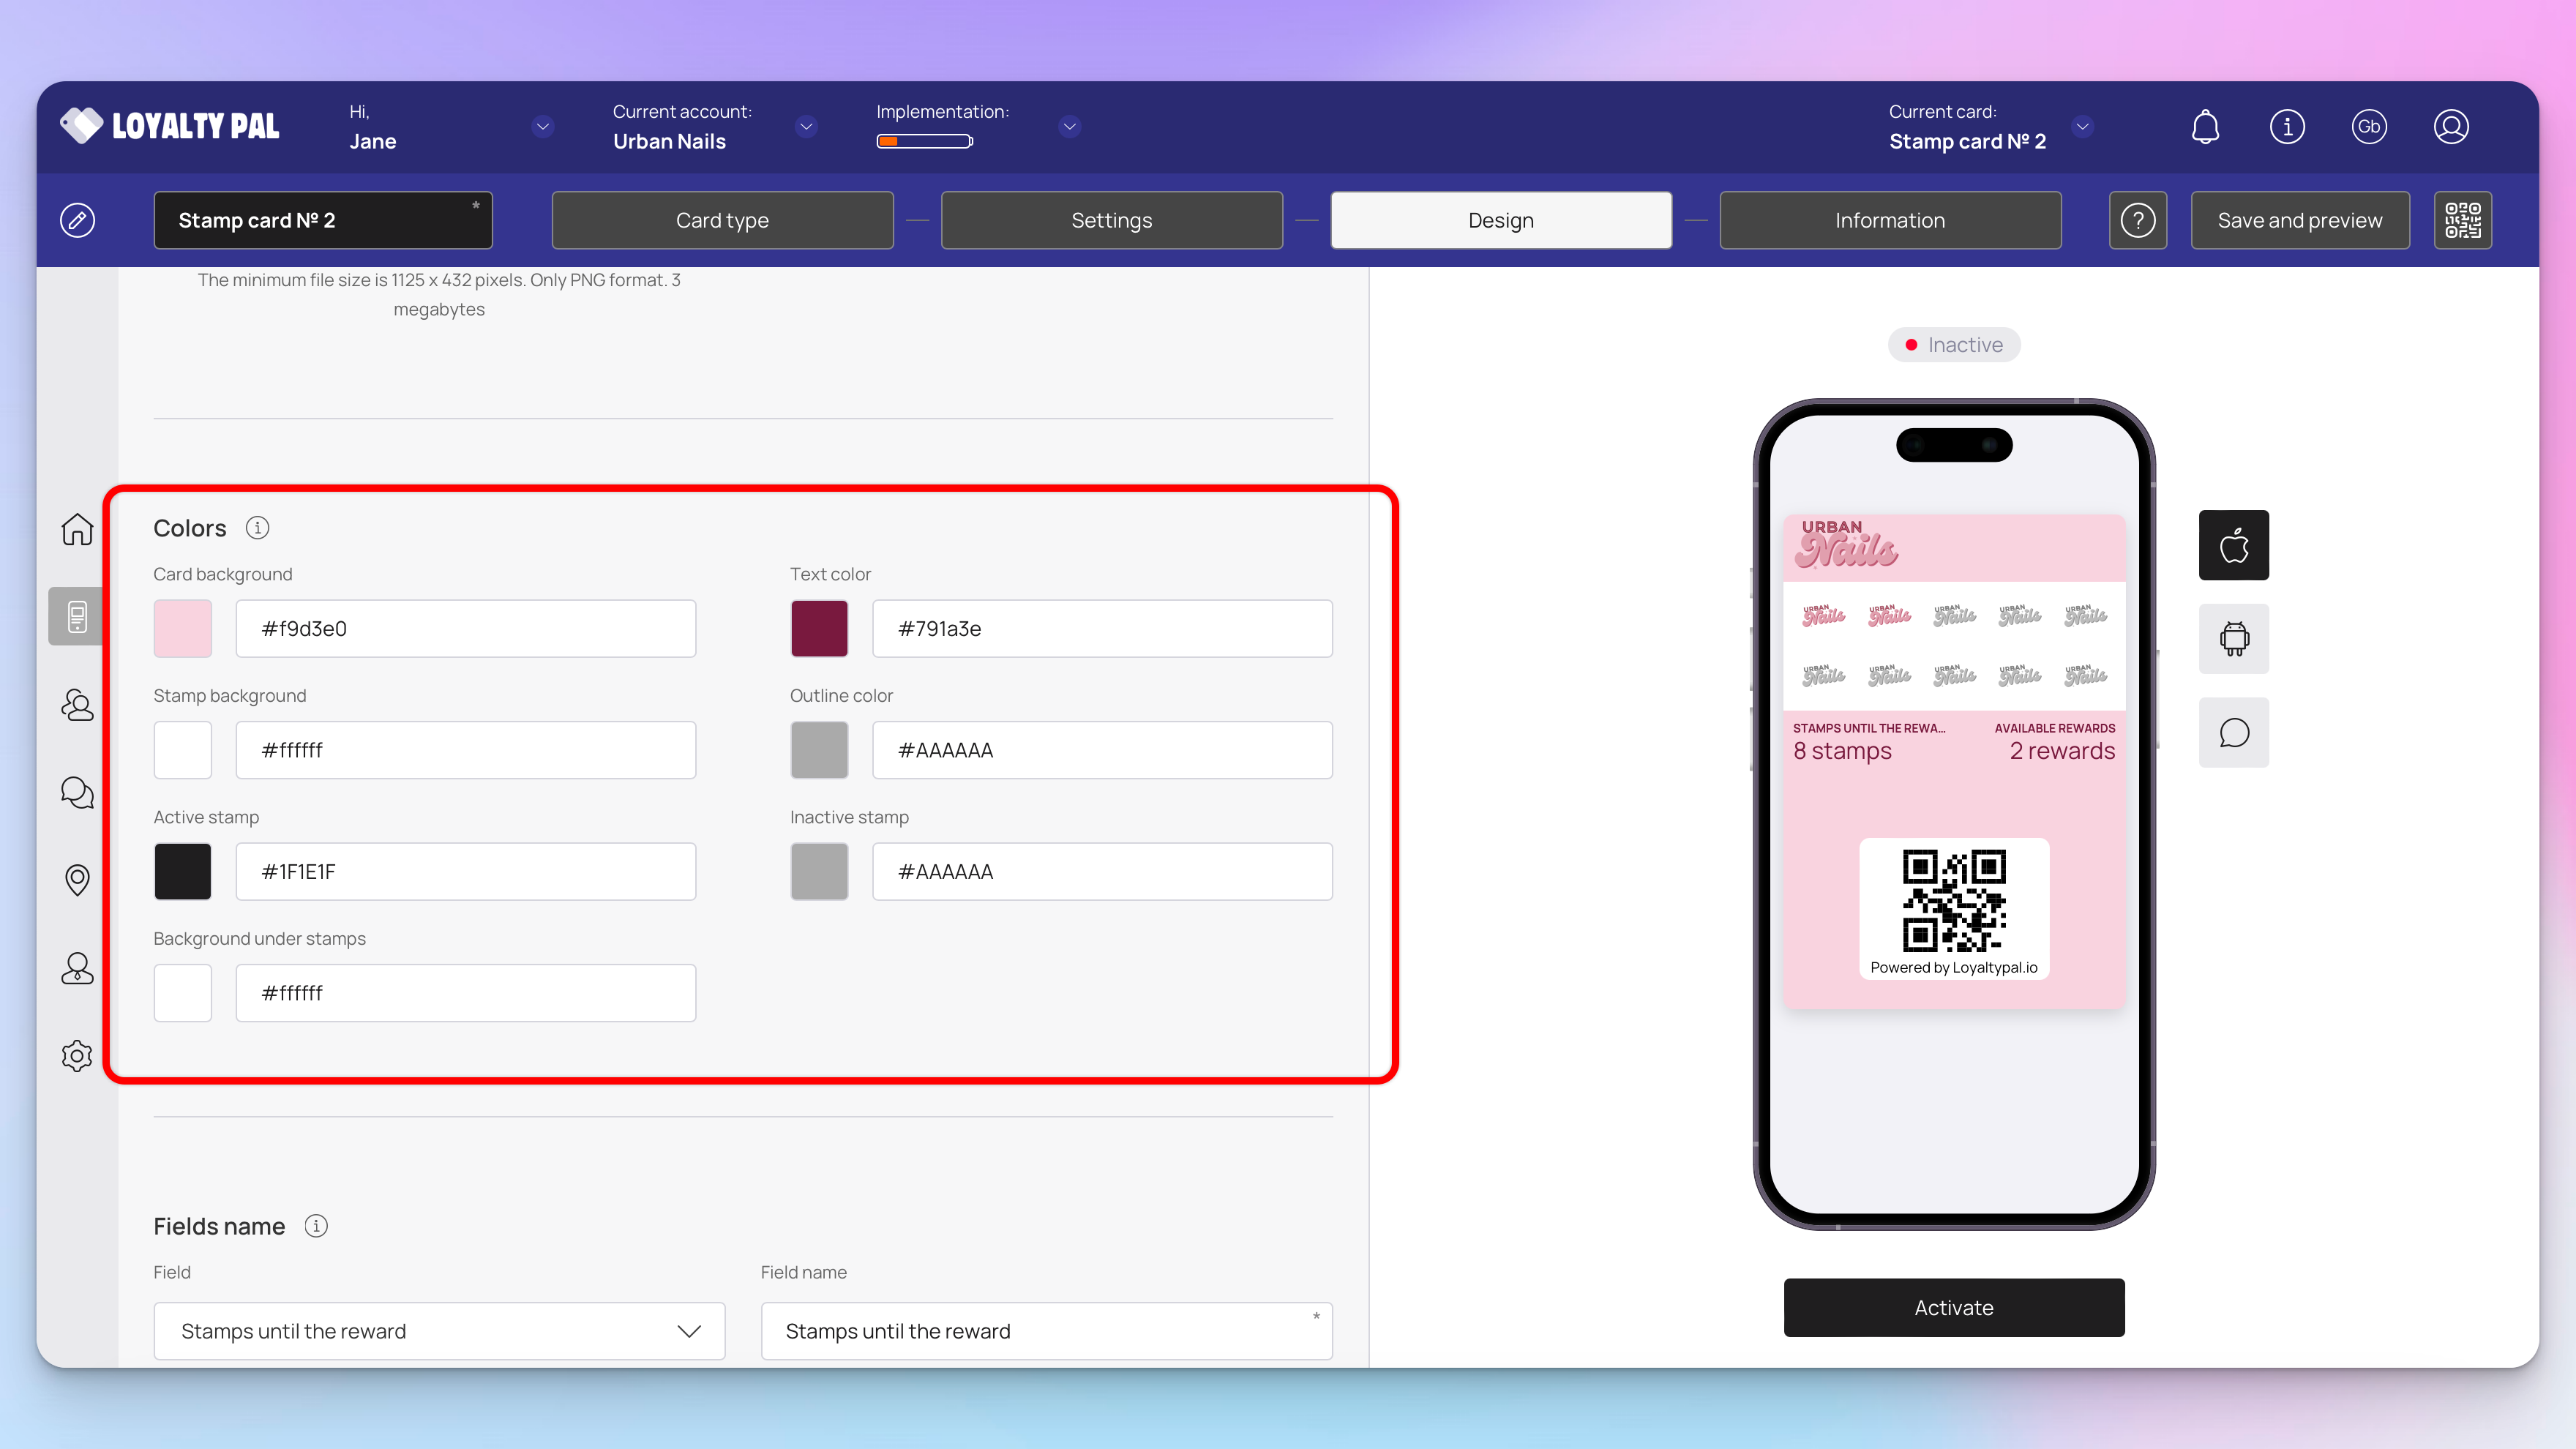
From the Colours section, you can set the colours for Card Background, Text Colour, Stamp Background, Outline Colour, Active Stamp, Inactive Stamp, and Background under stamp.
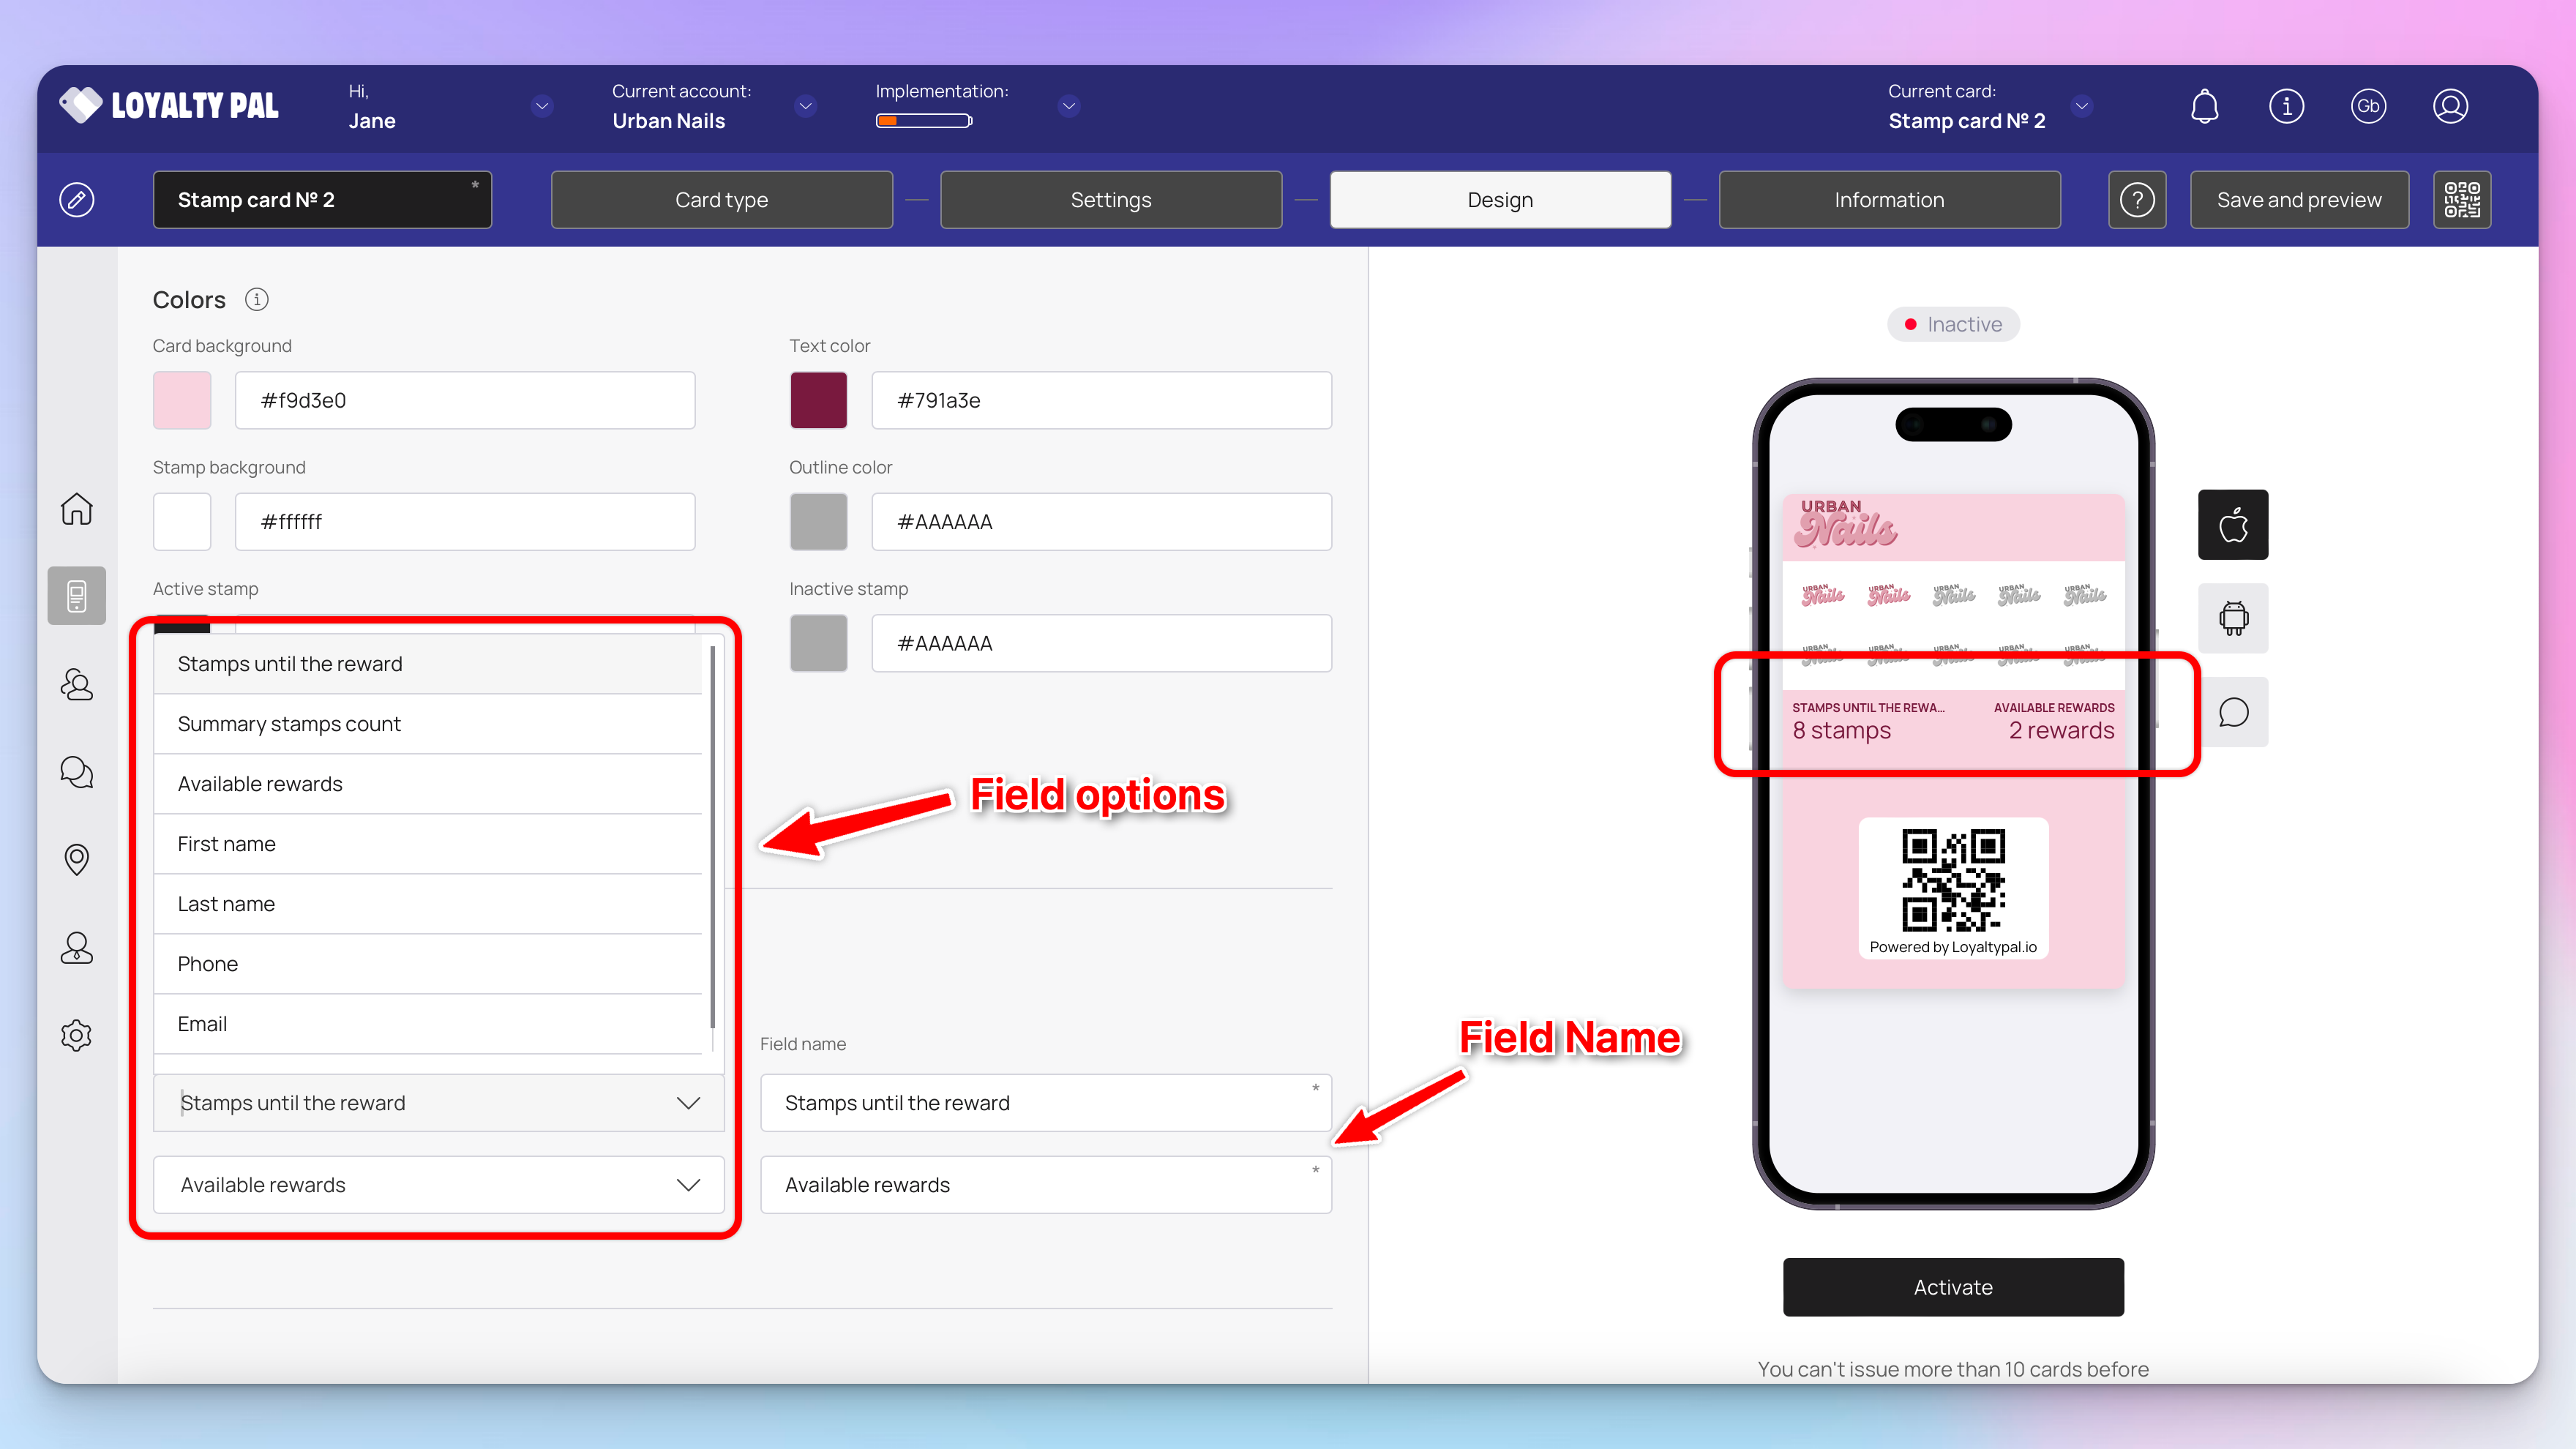
From the Fields heading, you can use the Field dropdown to select the type of field that appears on the card.
Similarly, the Field Name field allows you to enter what text appears on the card in the defined field.
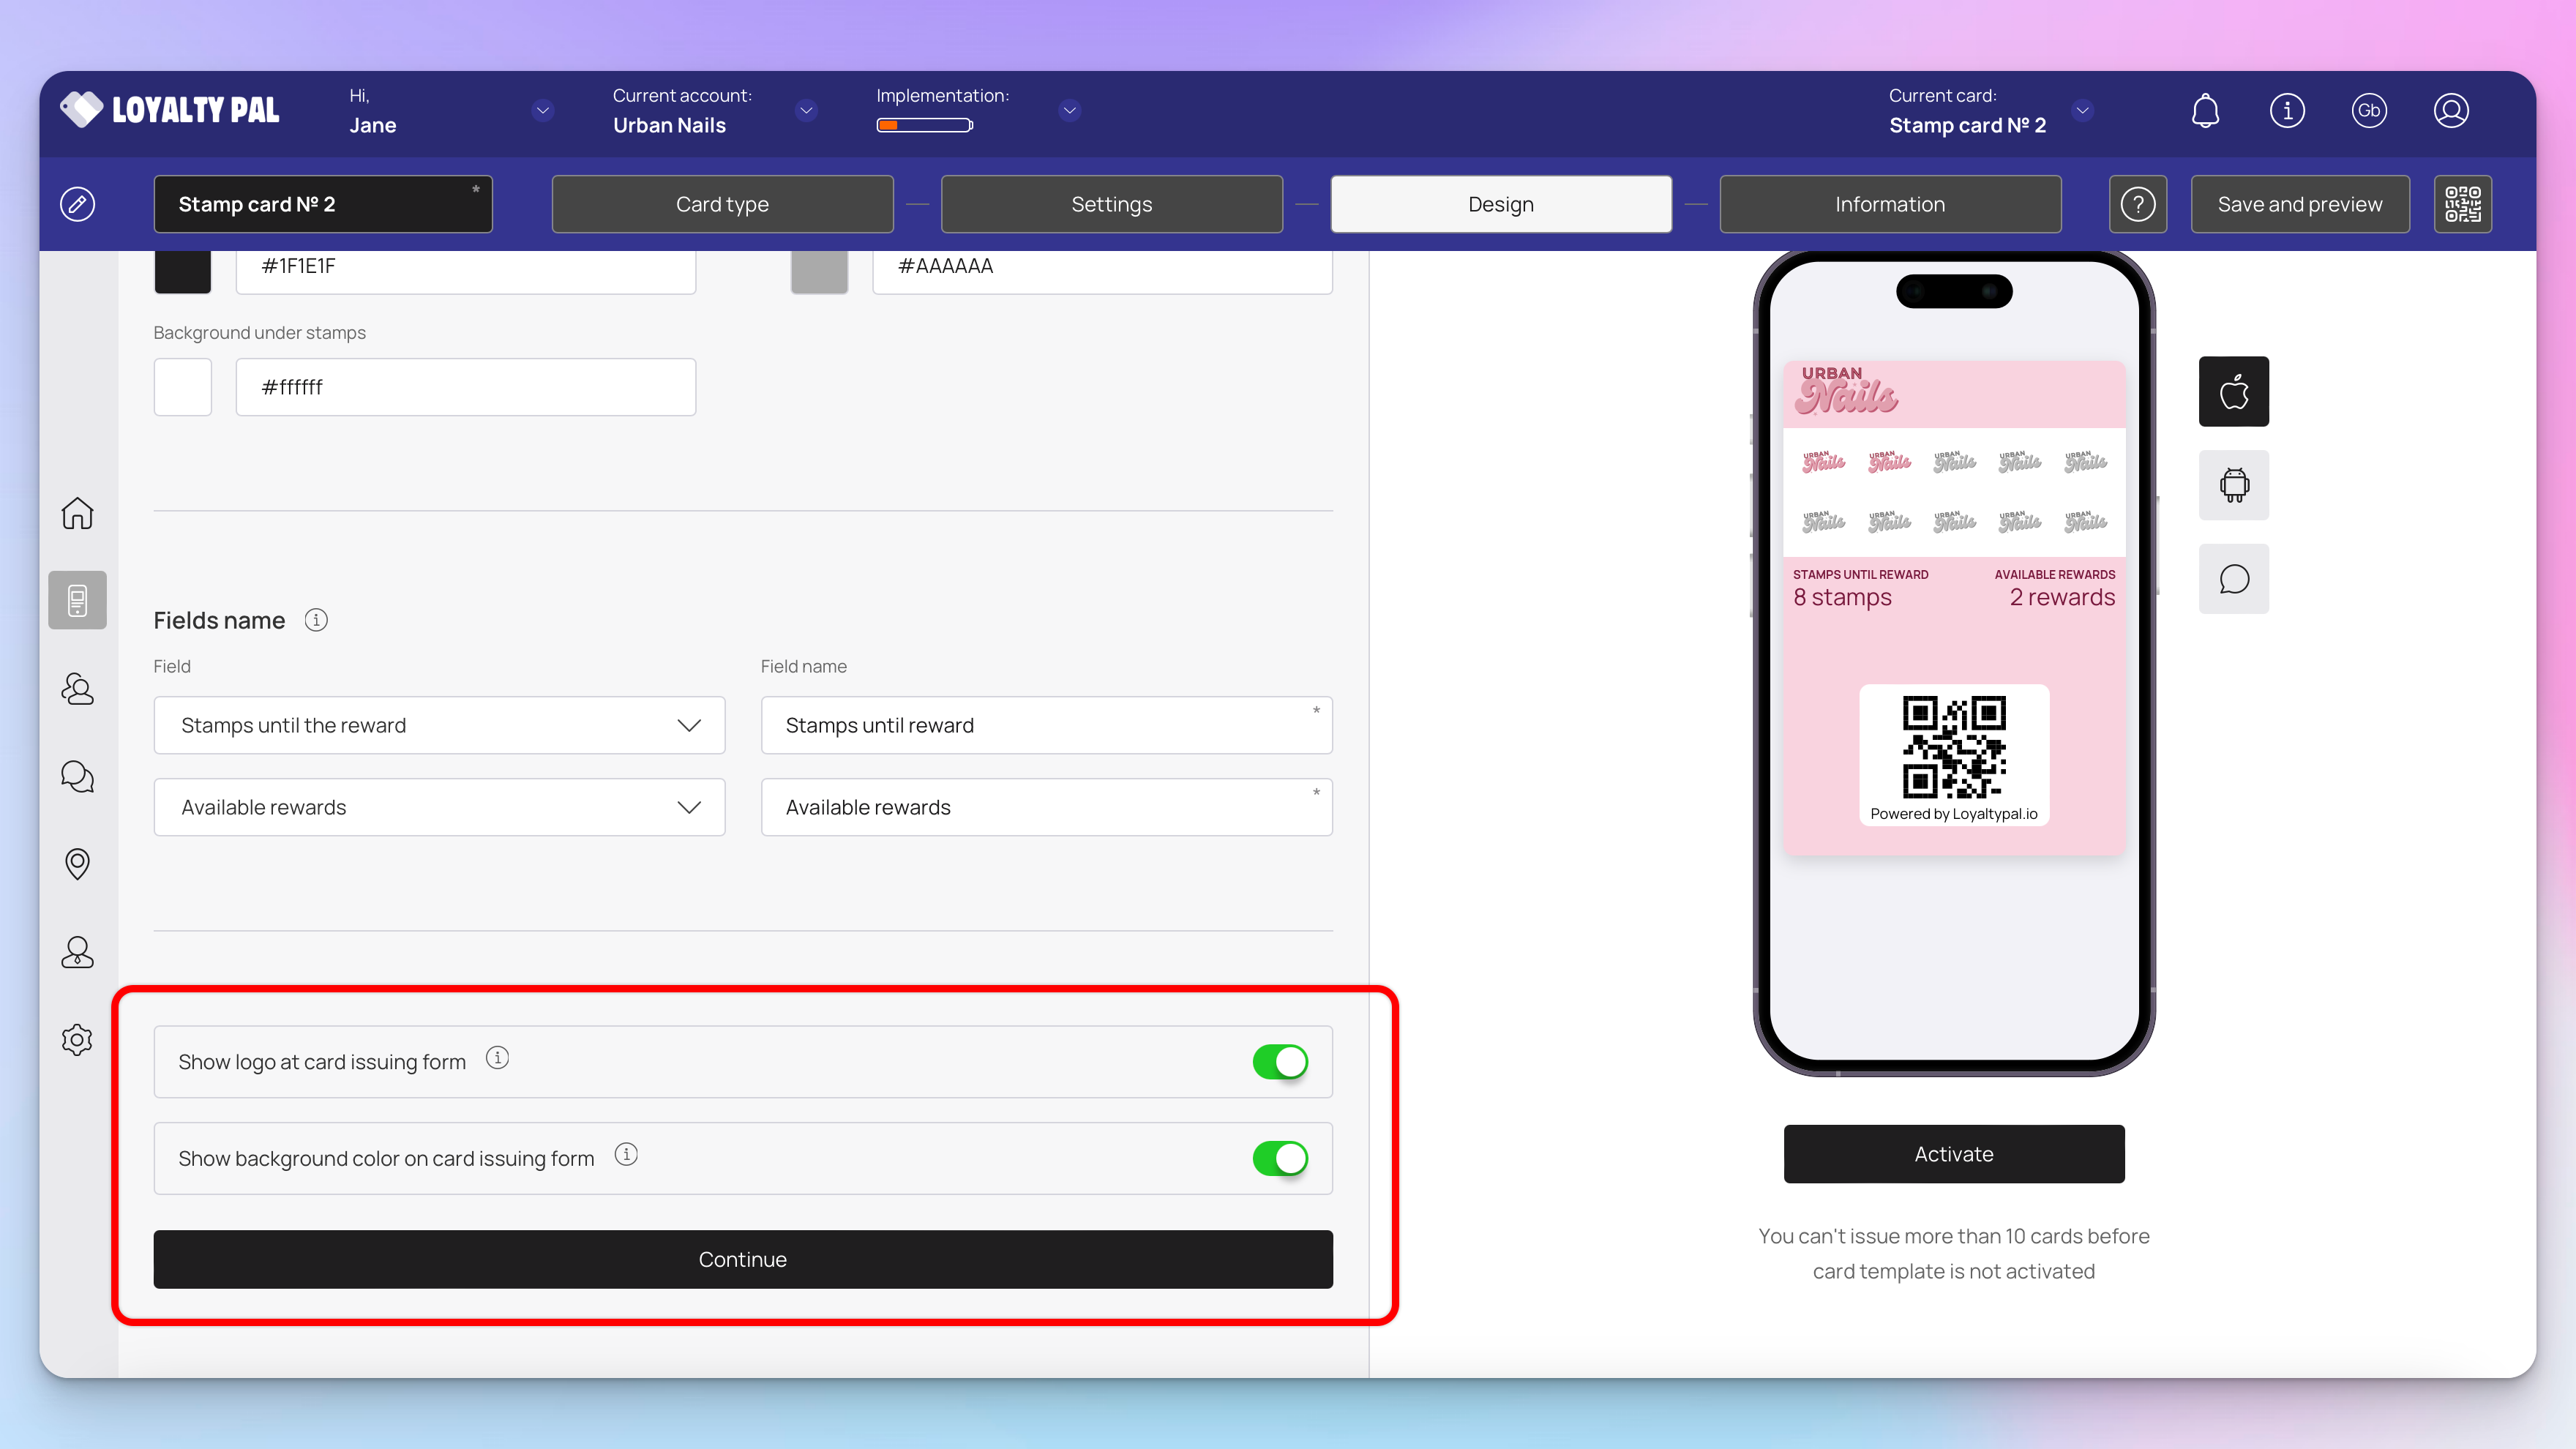
To show the logo on the Card Issuing Form, enable the 'Show logo at card issuing form' toggle button.
Similarly, enable the 'Show background colour on card issuing form' toggle button in case you want the background colour to appear on the card issuing form.
Design section now completed click 'Continue' to go into the next section.
Information
This section lets you fill relevant information that primarily shows on the backend of the card. The impact of each field can be viewed in the mobile screen preview displayed on the right side of the screen.
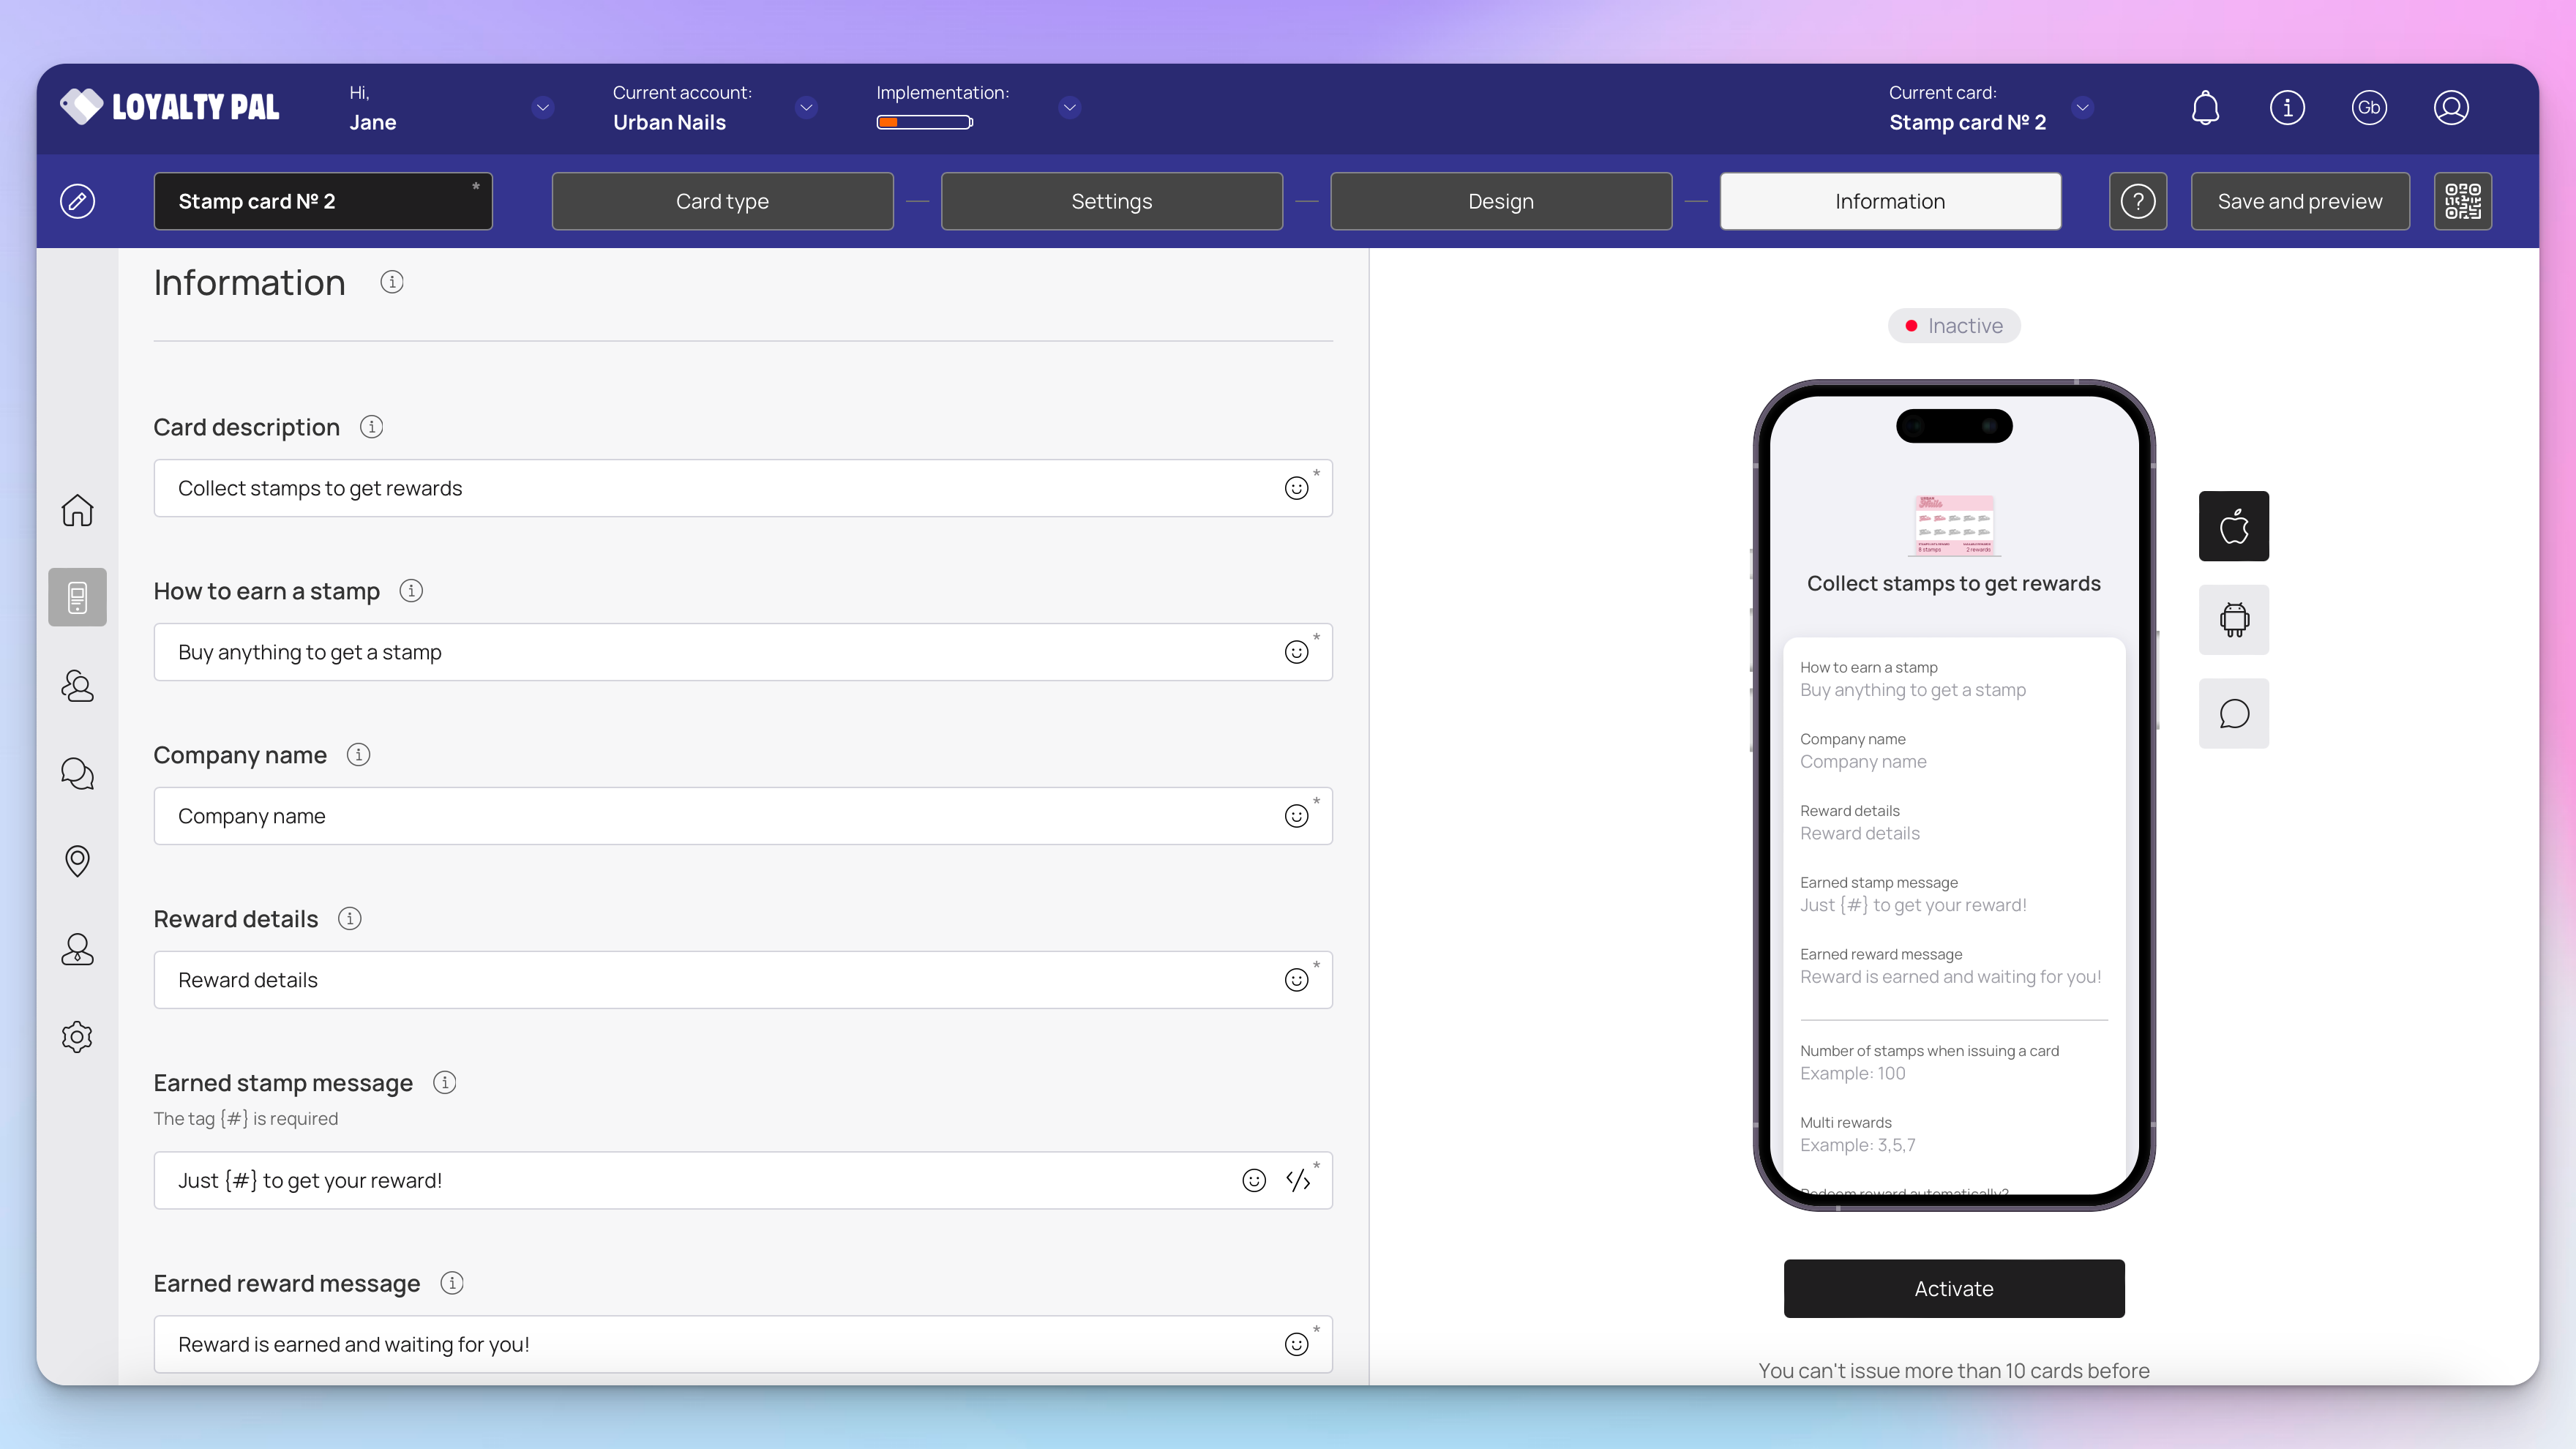
Card description: Give a brief description of the loyalty program. This will also show on the customers facing installation page.
How to earn a stamp: Explain to customers the requirements to earn a stamp. E.g. Spend a minimum of £2.00 to earn a stamp.
Company Name: Enter your company name.
Reward details: Give a description of what the customer will earn when they receive all stamps.
Earned stamp message: This is an automated push notification that will be sent after a customer gets a stamp. E.g. You've just been stamped only {#} stamps to go!
Earned reward message: This is an automated push notification that will be sent after a customer earned a reward once all stamps are collected.

Multi Rewards: Use the Multi Rewards field to enter the number of stamps separated by a comma (3,6,9) to issue multiple rewards on a defined number of earned stamps.
Redeem reward automatically?: In case you want the earned rewards to be redeemed automatically, select Yes from the 'Redeem Rewards Automatically?' heading.

Choose whether you want to activate the referral program using the Active and Inactive radio buttons under the 'Referral Program' heading.
Define when the bonus stamps are issued to a customer from the options available under the 'Get bonus at the moment when' heading. 'First visit / card use by a new customer' means that both the new customer and the customer that's referred them will only be issued the bonus stamps once the new customer has made a purchase and earned their first stamp. 'Card issuing to a new customer' means they will both receive the bonus as soon as the card is installed on the customers phone.
Stamp count for referrer: This is the number of bonus stamps the existing loyalty card holder will receive for recommending a friend.
Stamp count for new customer: This is the number of stamps the new customer will received as encouragement to start collecting stamps.
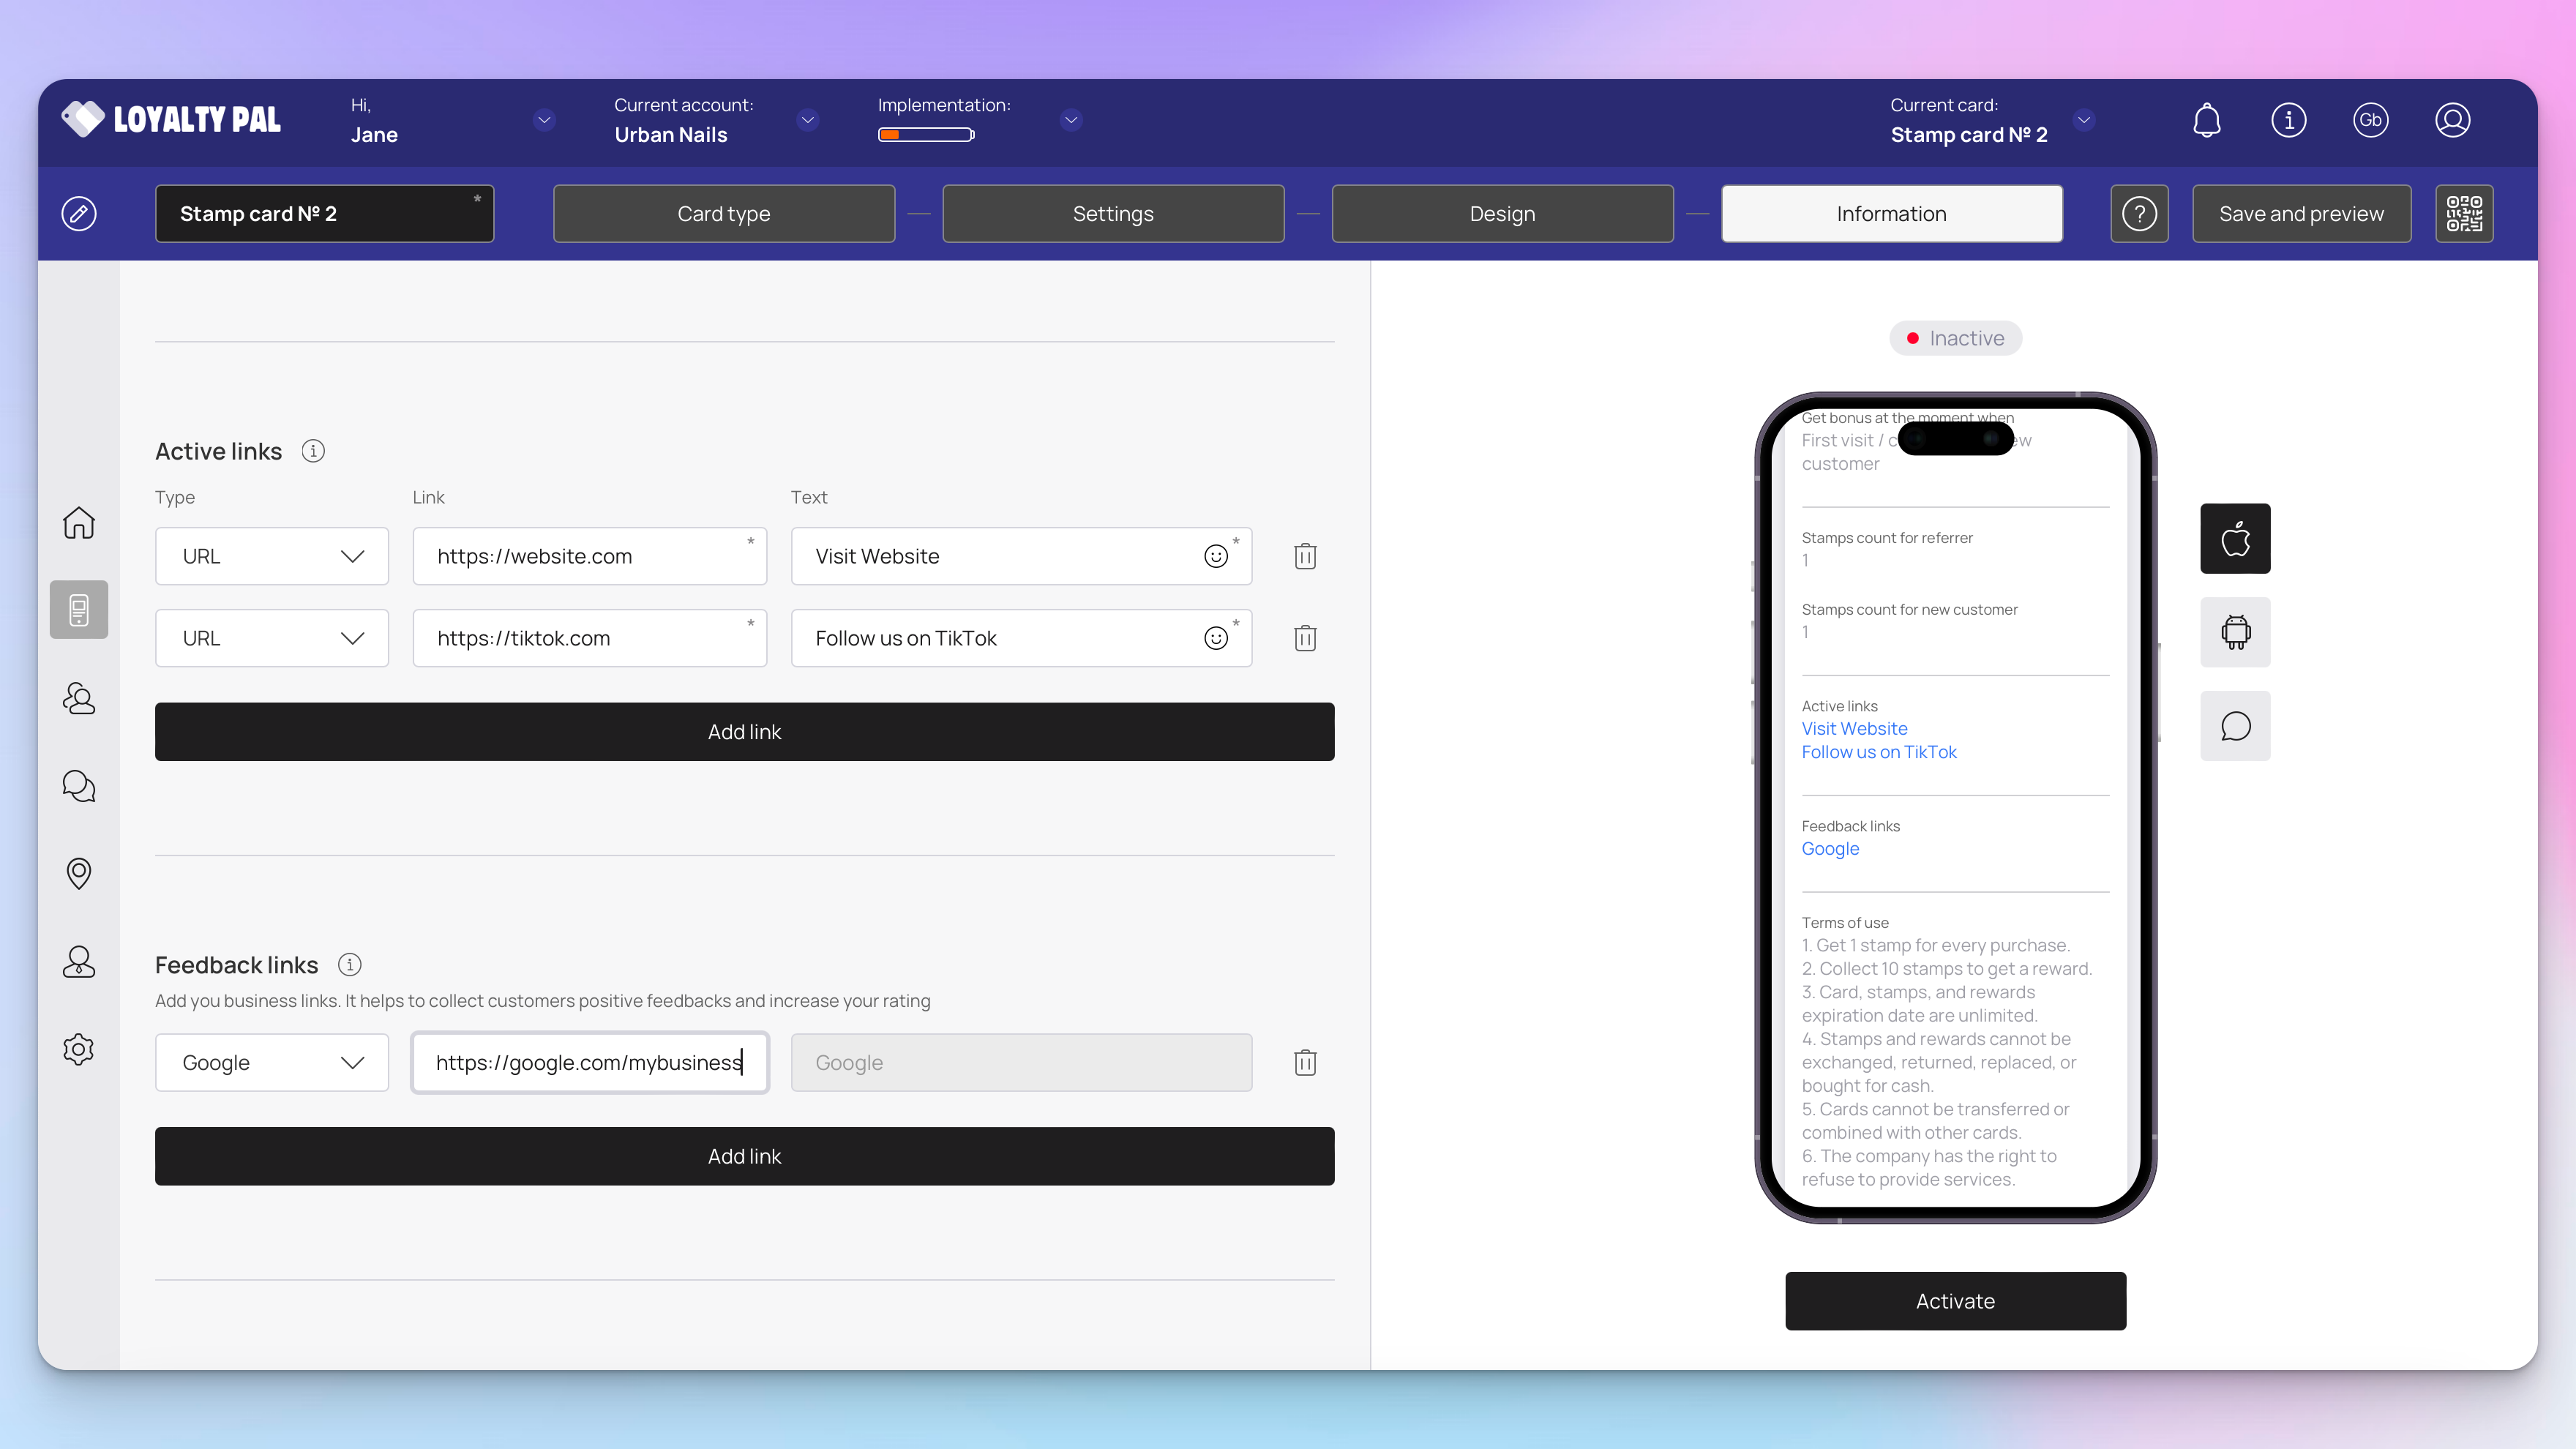
Active links: You can add custom quick links here such as website, social channels etc. From the Active Links heading, choose the type of link you want to include on the card using the Type dropdown. The available options include URL, Phone, Email, and Address
Feedback links: Similarly, use the link type dropdown and link fields under the Feedback Links heading to add your business links for the customer reviews to be recorded.
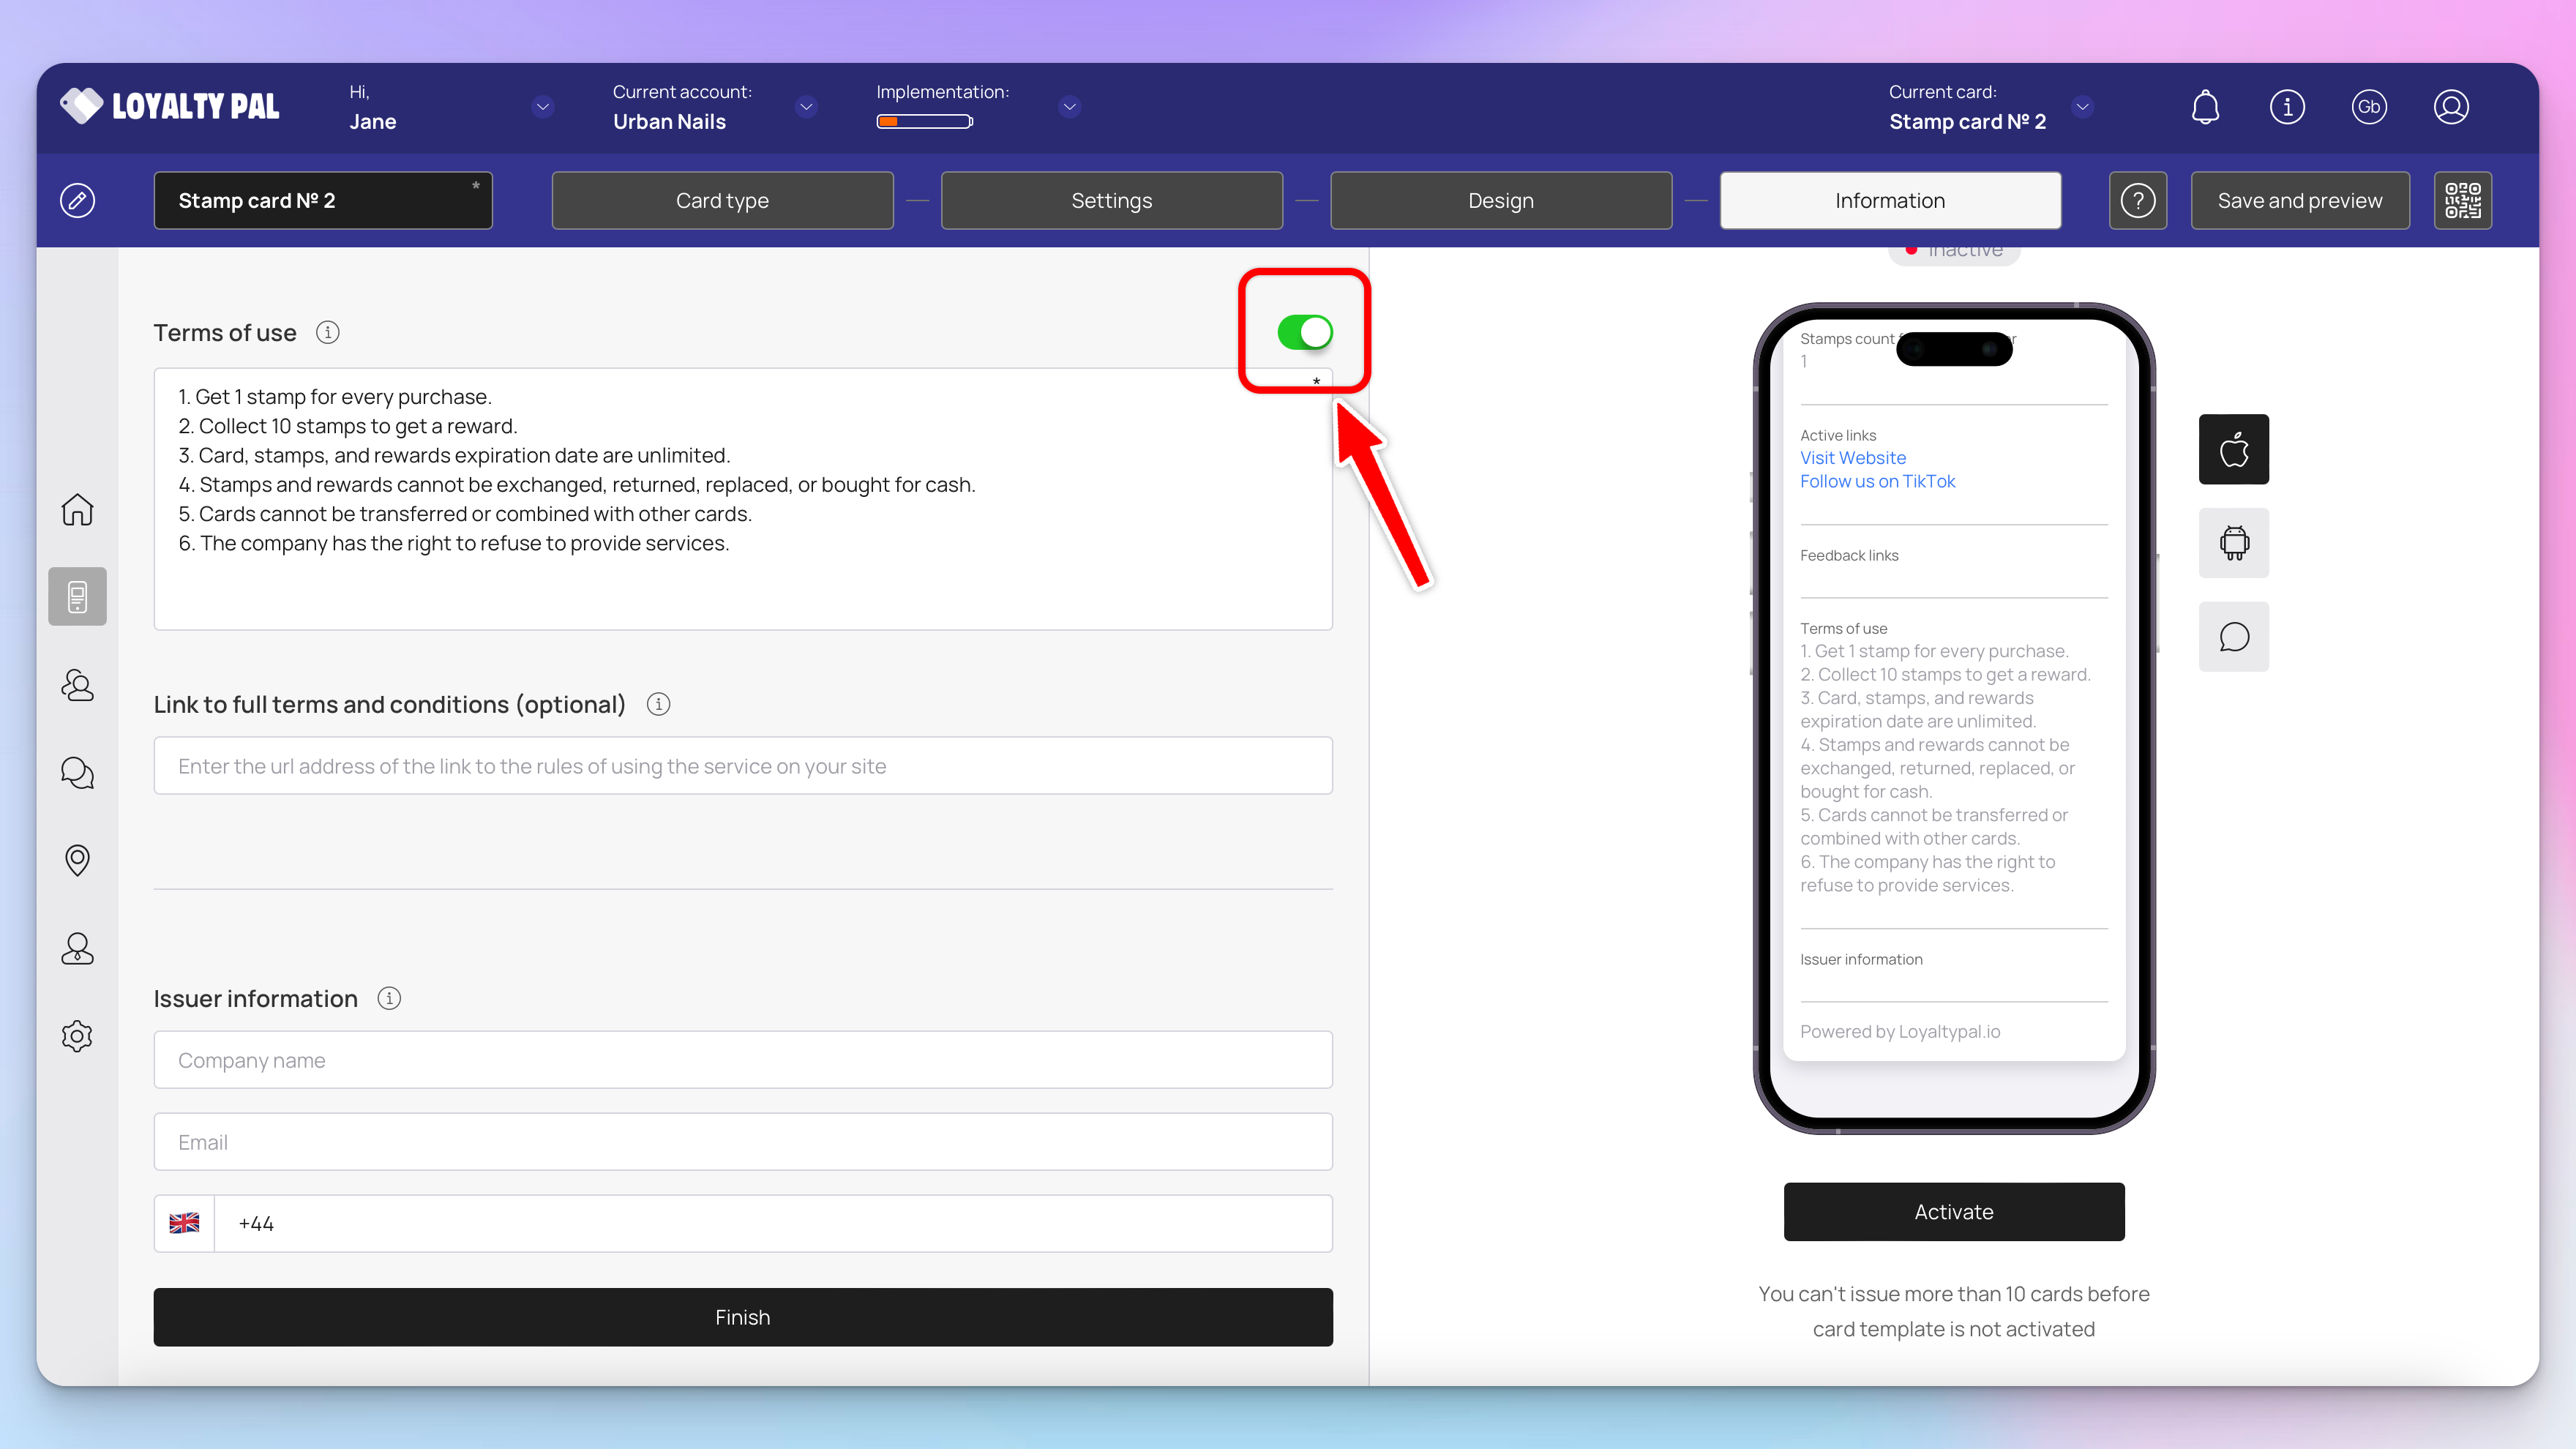
In case you want to include Terms of use on the card, enable the toggle button next to Terms of use heading. Here you can enter the rules for your card.
Link to full terms and conditions: Use the Link to full terms and conditions field to provide a link to the complete T&Cs of your business
Issuer Information: Use the Company Name, Email, and Contact Number fields under the Issuer Information heading to record the card issuer details to be displayed at the back of the card.
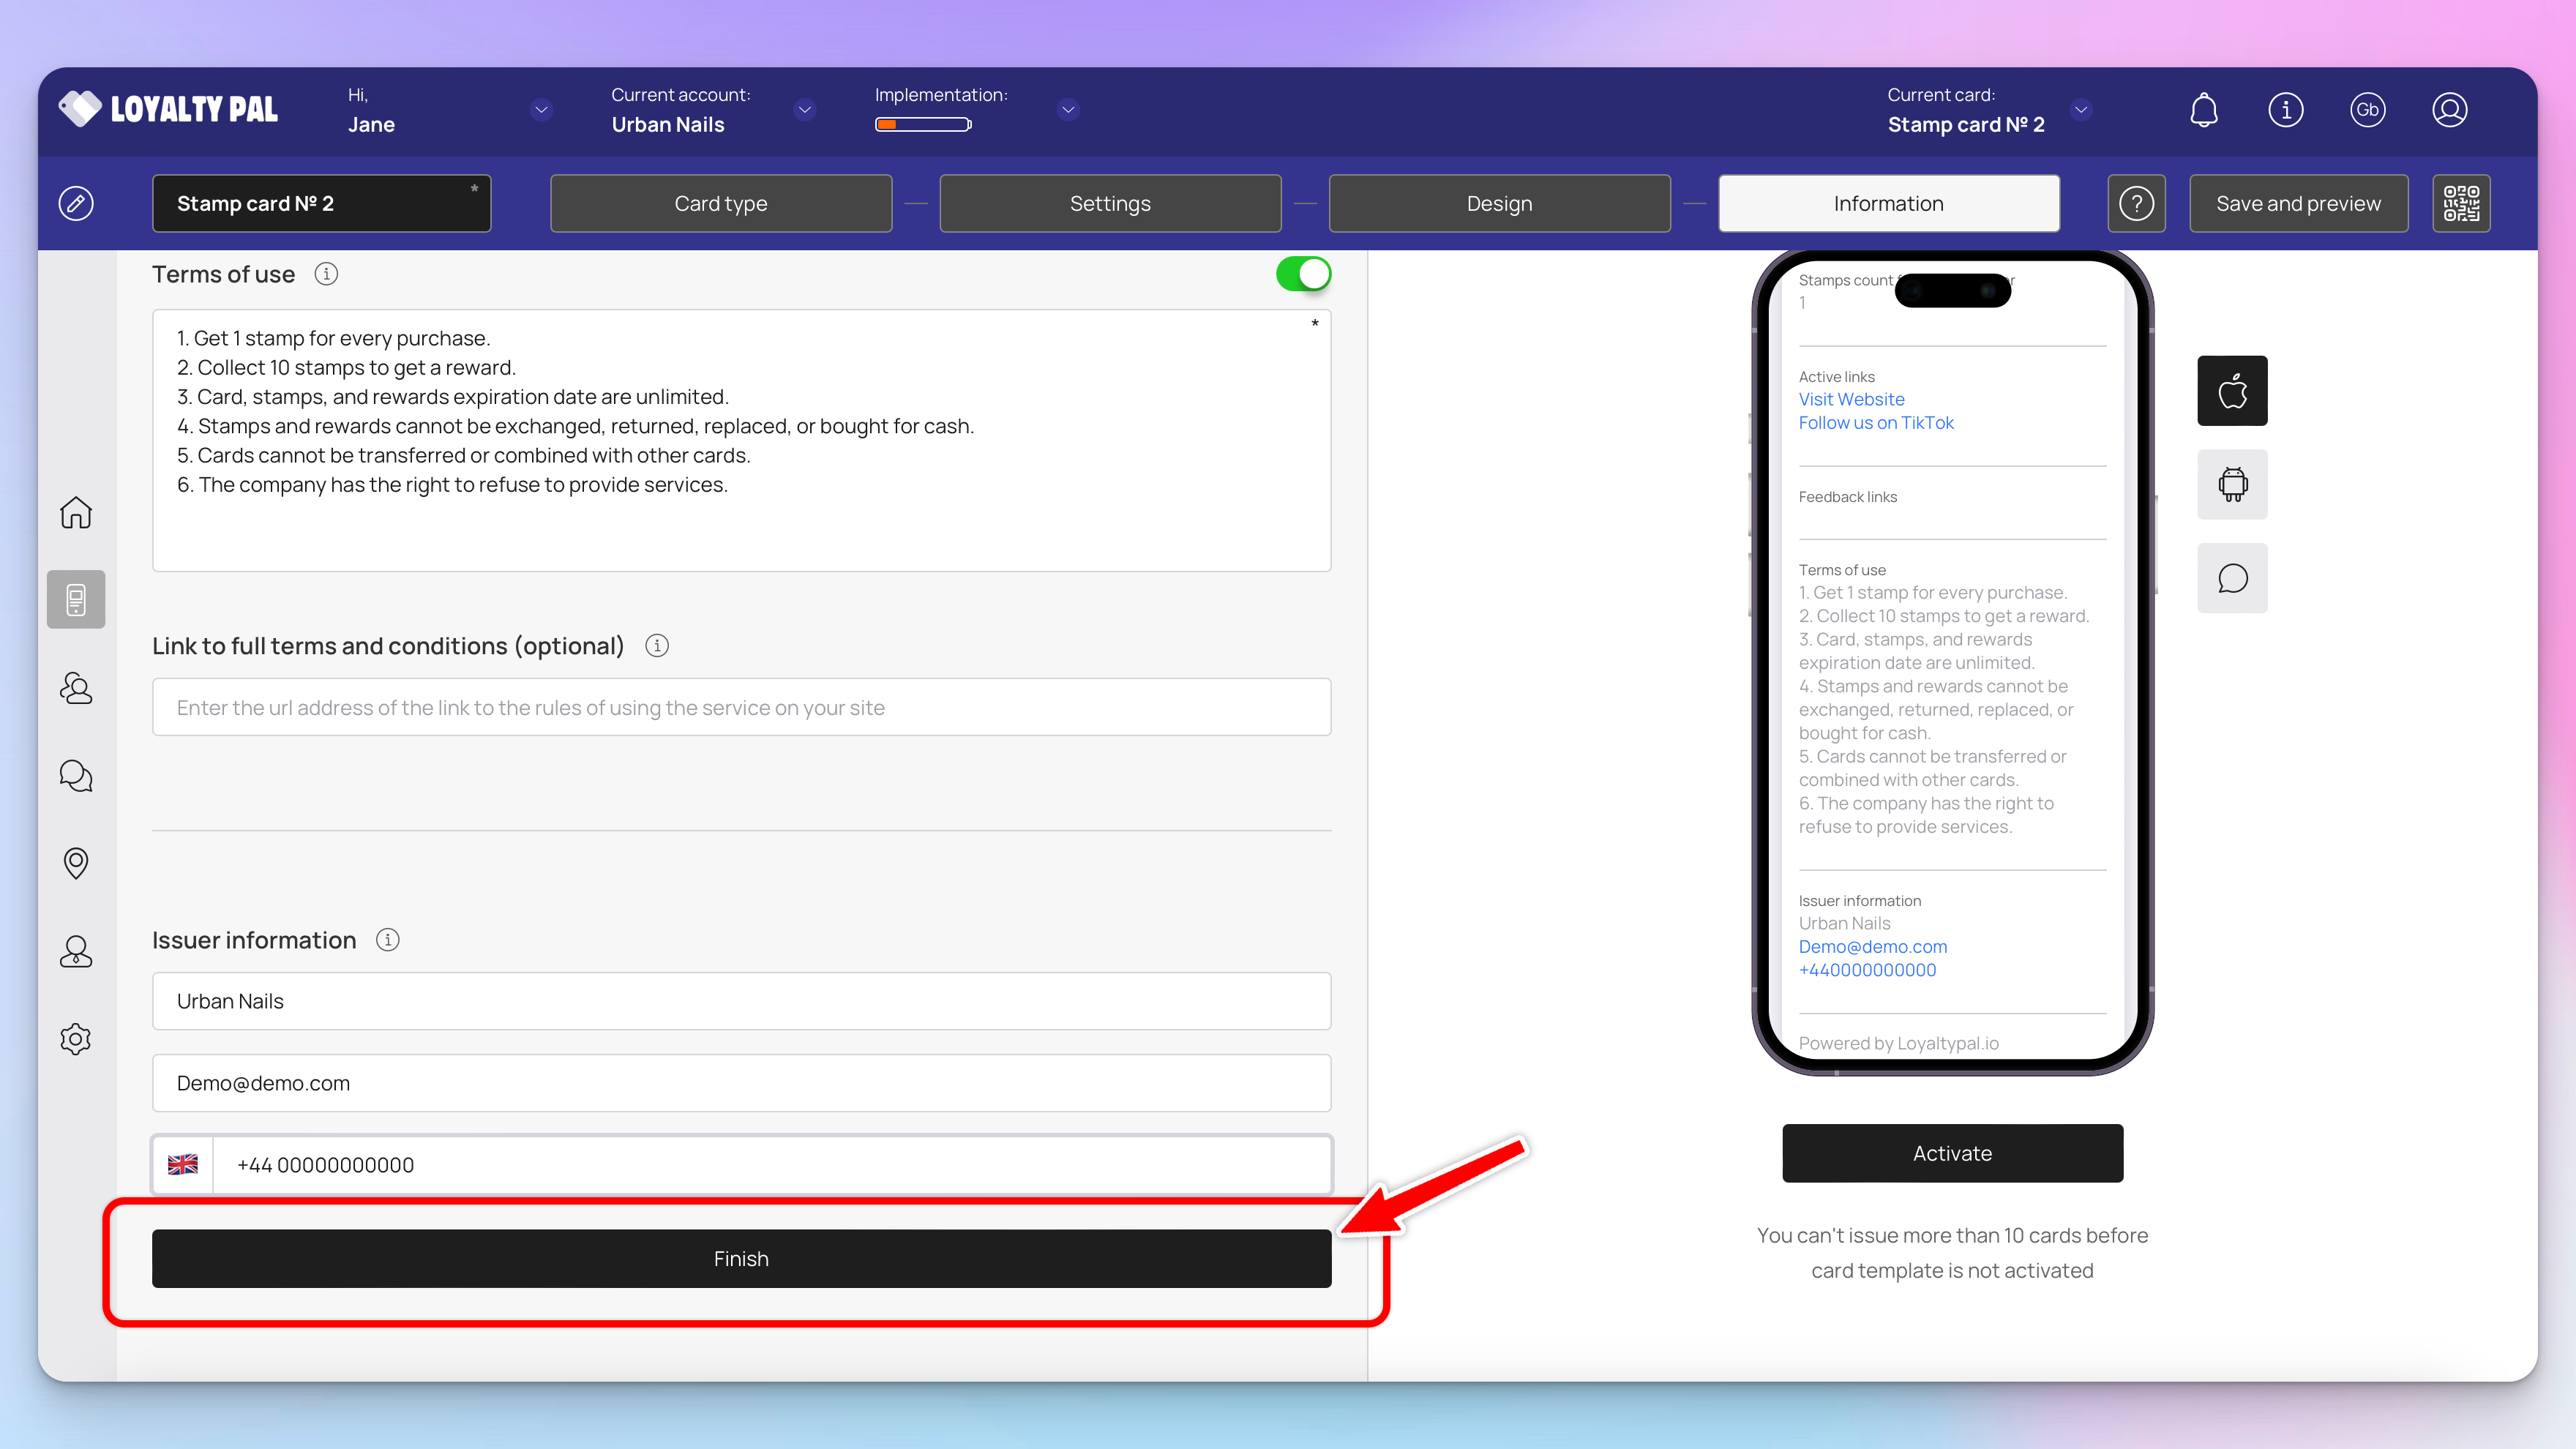
Once the details are recorded, click the Finish button.
Save & Preview

Your card is ready to be previewed, scan the QR code/copy link to your mobile device to preview and test the card.
Once you're happy with the card you must activate it. You can issue 10 cards before the card will need to be activated.